
How to Make a Reed Diffuser for Your Home
Learn how to make a reed diffuser to bring a light, natural scent to your home. It’s a simple DIY project that saves you money and uses essential oils for aromatherapy.
There’s nothing like walking into a fresh smelling home but that can be tricky, especially in the summer. Wet clothes get musty faster. Chlorine permeates the air. And that hot, summer trash is no good!
While I love to open up the windows and let a fresh breeze drift through the house, it’s also nice to have a light scent to help cover up those more pungent smells.
This is where a homemade reed diffuser can help. They give off a delicate scent that won’t blow you over the second you walk in a room.
A DIY reed diffuser is super simple to make. You can customize the scents when you make your own. Plus, you can choose the perfect bottle to match your homes style.
(THIS POST PROBABLY CONTAINS AFFILIATE LINKS. OUR FULL DISCLOSURE POLICY IS LONG & BORING BUT, YOU CAN FIND IT HERE.)

How To Make a Reed Diffuser for Essential Oils
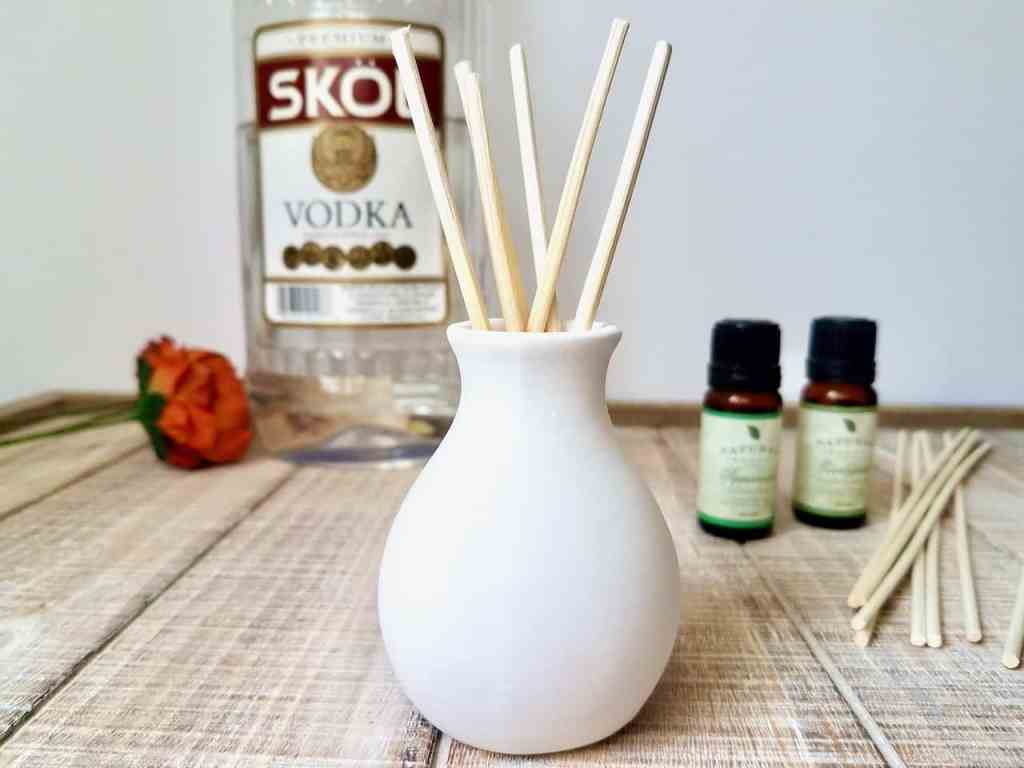
It’s crazy easy to make a reed diffuser. You only need a couple of supplies:
- a couple of cute bottles, with a small opening, for different rooms in your house
- carrier oil or water
- vodka, 99% rubbing alcohol, or witch hazel
- wood reeds
That’s technically all you need but you do have a couple of decisions to make when it comes to diffuser oil. You can buy some or make your own. I prefer to make my own so I can customize the smell.
DIY Reed Diffuser Recipe
I’m going to give you a pretty basic reed diffuser recipe that you can customize to fit your needs.
- 1/4 – 1/2 cup carrier oil (fractioned coconut oil) or water
- 1 – 2 tablespoons of vodka, rubbing alcohol, or witch hazel
- 20-40 drops of essential oils

- Add all the ingredients straight to a measuring cup that pours well.

- Use one reed to stir everything up really well.
- Pour the diffuser liquid into the bottle.

- Then add reeds to the bottle.
- You’re all done.
The reeds will absorb the solution. I like to wait about 10 minutes and then flip them over. That will help release those awesome smells into the room faster.
It’s hard to give an exact recipe when the bottle size isn’t known. If you use a really small bottle then you can go with 1/4 cup of oil/water, 1 tablespoon of binder (alcohol), and 20 – 30 drops of essential oils. A bigger bottle can go with the bigger measurements.
Oil vs Water
One big question is oil or water when making your reed diffuser recipe. Honestly, it’s totally up to you.
Water is easier if you have distilled on hand. Some people prefer to use it because it’s cheap and moves up the reeds faster than oil. It does evaporate faster than oil but it is easy to clean the bottles out when it’s time to swap scents.
Oil is more expensive but doesn’t evaporate. It can however go rancid, especially if it’s sitting in direct sunlight. Some oils work better than others for a reed diffuser so I’ll go over that in the next section.
Choosing a Binder
You also need to choose a binder. This is the alcohol or witch hazel. The binder helps keep the essential oils mixed into the oil or water and it helps to thin the oil so it moves up the reeds better.
I prefer vodka because both witch hazel and rubbing alcohol have a strong scent that can interfere with your essential oils.
What Oil Works Best in a DIY Reed Diffuser?
Fractioned Coconut Oil is the best oil to use in homemade reed diffusers.
- It’s clear so you don’t have to worry about the color looking great in any bottle.
- It’s odorless so your essential oils blends really shine.
- It thin so it wicks up the reeds well.
- It won’t solidify in cold weather like non-fractioned kind does.
Safflower Oil is also odorless but it has a yellow tint to it. Sweet Almond Oil is closer to the color of honey. Both of these also work well in DIY reed diffusers if you don’t mind the color of the oils when they are on display or if you use a bottle you can’t see through.
Tips for Making Your Reed Diffuser Smell Stronger
A reed diffuser lets of a subtle scent which I really like. I personal don’t like to be hit with a strong smell walking into a room.
Even good scents can go bad when there’s too much of it. Like a high school boy with axe body spray. One spritz is enough dude.
But, there are a couple of things you can do to make that scent last longer and be more present in the room if you need to.
Tip 1: Use reeds not bamboo sticks. Many people like to save money and use bamboo sticks from the dollar store when making their own reed diffuser. While the skewers will work they won’t work as well as the reeds.
The reeds are specifically designed to draw up the oil through little tubes. Bamboo skewers are just wood so while they will absorb some of the diffuser oil it won’t be as much and therefore they won’t have as strong of a smell.

Tip 2: Flip the reeds no and then. This will help draw up more oil into the sticks and release the scent into the air. I like to flip them every couple of days but you can always flip them sooner if you want more scent.
Tip 3: Make a new batch before guest arrive. I usually make a new batch of diffuser oil every week or so but if I know someone is coming over then I’ll wait and make a fresh batch about an hour before they arrive.
Tip 4: You can use any bottle to make a reed diffuser but one with a narrow top will help the liquid not evaporate as fast which makes your oil last longer.
Tip 5: Reed diffusers work best in smaller areas so if you have a large room then you might need more than one. Think strategically about where to place them in a large room to get the most scent released to the whole room.
A nice central spot will help the scent get distributed to more of the room but two reed diffusers across the room from each other can also work.
Tip 6: Don’t place a diffuser near an open window. You’d think a nice breeze would carry the scent through more of the house but it can also carry that smell right out the window.
Tip 7: You can always add more essential oils to your diffuser mix. If you still have water or oil in your diffuser then just add more drops of essential oil. You don’t need to throw the whole mixture out unless you’re using oil and it smells rancid.

Essential Oil Blends to Try
There are all sorts of diffuser blends that you can use in your new homemade reed diffuser. You’ll quickly start to get an idea of what you and your family like. Here are a couple of blend ideas to get you started.
Relax – 10-20 drops of lavender, 10-20 drops frankincense
Opened Window – 20 drops eucalyptus, 10 drops peppermint, 10 drops rosemary
Clean Home – 10 drops lemon, 10 drops rosemary, 8 drops vanilla, 8 drops lavender
Get Motivated – 15 drops orange, 15 drops rosemary, 10 drops peppermint
Enjoy a Lovely Scented Home!
Since these homemade reed diffusers give off a very light scent and are so easy to make, you’ll soon find yourself making them for all over your home. Here’s a quick look at a glass one I have sitting on my bathroom vanity right now,
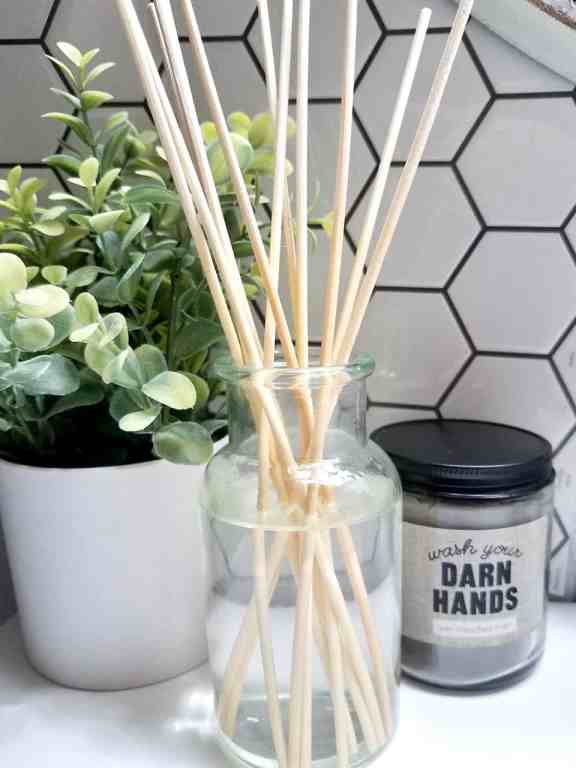
These diffusers look so elegant that they make great decor. Just pick the bottle that goes best with your style.
I picked up this glass vase from Hobby Lobby for 3 bucks. The cream vase came in a set of three from the deals section at Target. They were also 3 bucks and now I have 3 small homemade diffusers I can put in other rooms.
What do you think? Will you try to make your own reed diffuser? I honestly had never used one in my home before but always liked the look so I’m happy to finally own some on a budget.

DIY Reed Diffuser
Materials
- 1 bottle with a small opening
- 8-10 reed sticks
- 1/4-1/2 cup carrier oil or water
- 1-2 tbsp vodka or 90% rubbing alcohol or witch hazel
- 20-40 drops essential oils
Instructions
- Add all the ingredients straight to a measuring cup that pours well.
- Use one reed to stir everything up really well.
- Pour the diffuser liquid into the bottle.
- Then add reeds to the bottle.
The step-by-step instructions are so clear, and it’s a wonderful way to add a personalized touch to my living space with my favorite essential oils. Thank you.
Happy scenting!