3 Skull Crafts To Make This Halloween
Choose between three different DIY skulls to decorate your house for Halloween. These budget-friendly skull crafts can be customized to fit your Halloween home vibe.
(THIS POST PROBABLY CONTAINS AFFILIATE LINKS. OUR FULL DISCLOSURE POLICY IS LONG & BORING BUT, YOU CAN FIND IT HERE.)
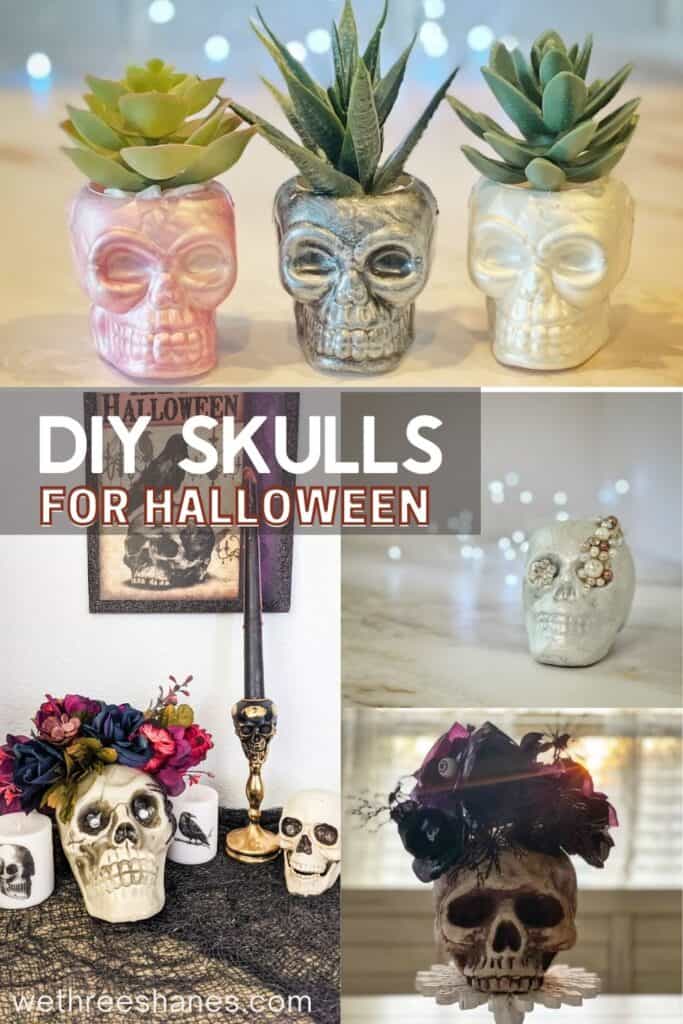
DIY Skull Heads
Are you one of those people who waits all year long to put up their Christmas decorations? Well, that’s how I am with Halloween. I absolutely love it.
In fact, Halloween is my favorite time of year because skulls and spiders are not seasonal in my opinion. I use them all year long depending on what they look like.
Imagine how excited I was when I started seeing Halloween stuff pop up in craft stores and the Dollar Tree?! I recently moved and some of our stuff didn’t make it to the new house but instead are stuck in storage 2 hours away.
Of course my Halloween decorations are one of the things in storage, which means I get to make new stuff. SCORE! I headed straight to Dollar Tree.
Now I’ve got 3 skull crafts for you. You can make your favorite or all three. You can’t go wrong with multiple skulls in October.
Skull Succulent Decor Craft
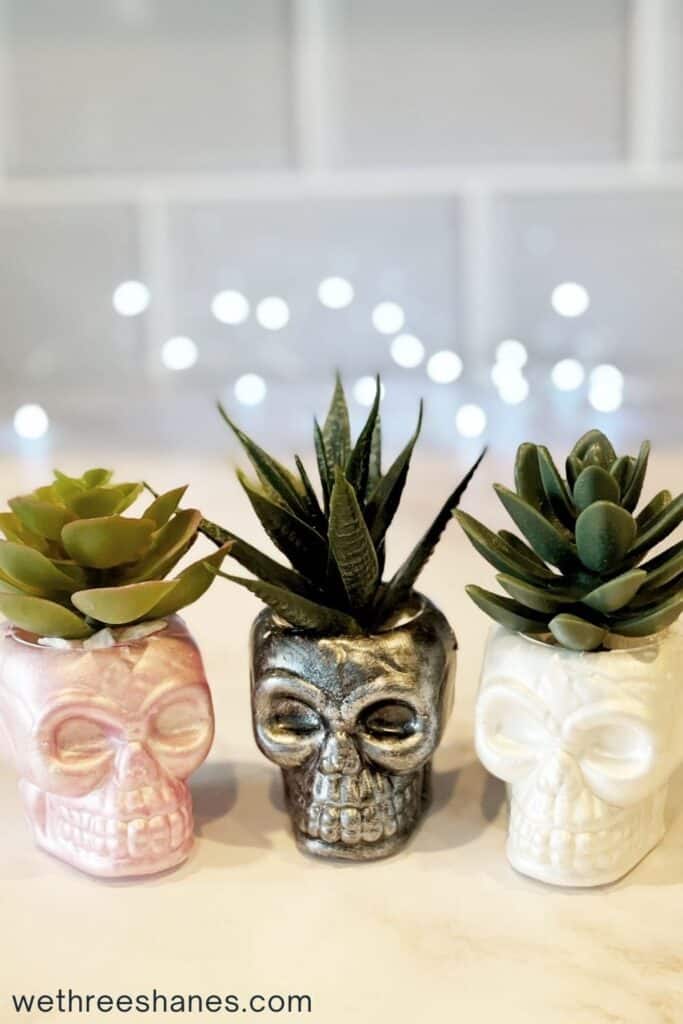
First, I found these cute little skull buckets. It was a pack of 4 and they were at the dollar store which make these a pretty good and cheap find. Aren’t they cute?!
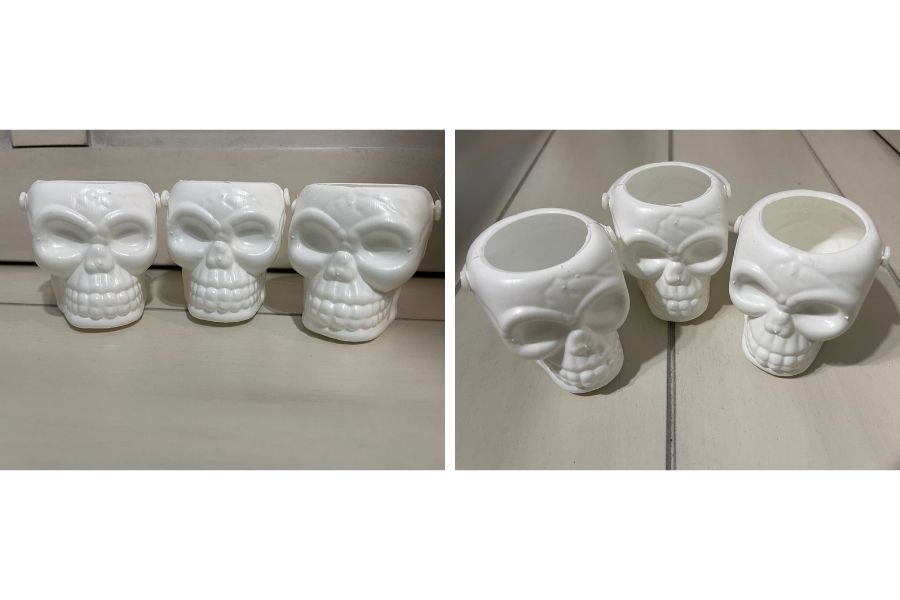
I immediately thought they would make great pots for a succulent and I was right.
Here’s what you need to make that happen:
- Small Skull Buckets from the Dollar Tree – pack of four
- Fake Succulents – Mine are from Ikea but you can find them at the Dollar Tree and Walmart
- Small White Rocks – Dollar Tree find
- Paint – I used acrylic but you can use spray paint
- Foam – Also, Dollar Tree
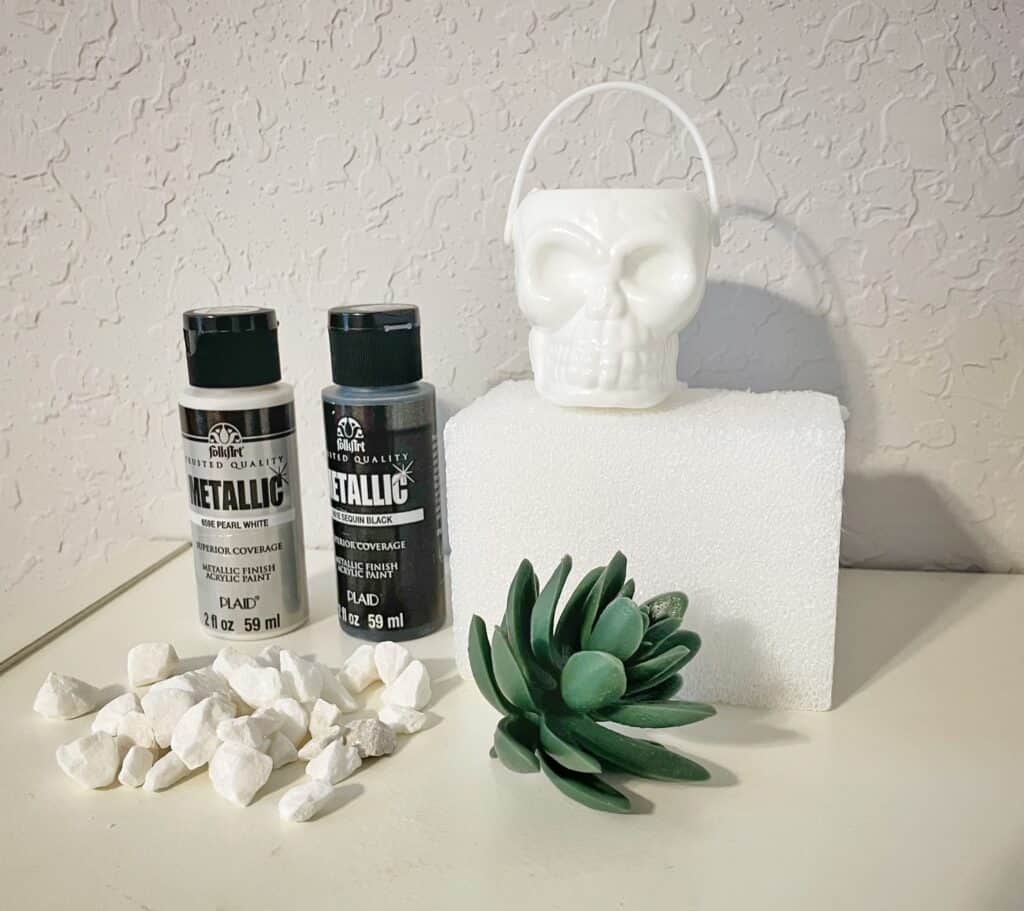
Step 1 – First things first, I did not want them to stay plain white. The skulls are obviously plastic so I wanted to paint them to take away the cheap look.
I busted out some craft paint I had at home but originally got at Walmart. I painted one white, one black and silver, and one pink. All three, I feel, turned out really cute.
Step 2 – Next, I used flower foam, also from the Dollar Tree, to fill up the skull. Cut it into smaller pieces that fit down into the skull head.
Step 3 – After that gets put down inside the skull, I fill in the remaining free spots with white rocks, also purchased at the Dollar Store. You don’t need these but I wanted this look. You also could use fake moss.
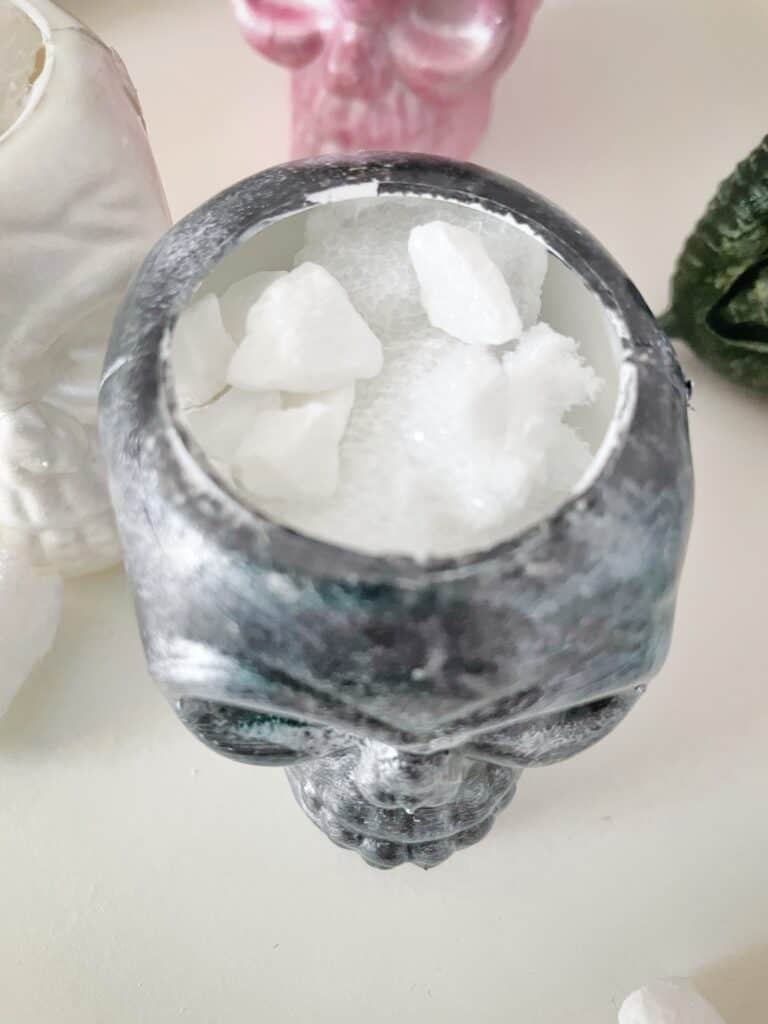
Step 4 – Lastly, you put your succulent into the foam. Mine is staying fine but if yours is tipping, you could always use some glue. That’s it folks! Aren’t they cute!?!
DIY Skull Planter or Center Piece
For the next skull head, we are using a bigger plastic skull to make a Halloween Skull Planter. This skull looks great sitting on a ledge or bookshelf or as a fun Halloween centerpiece.
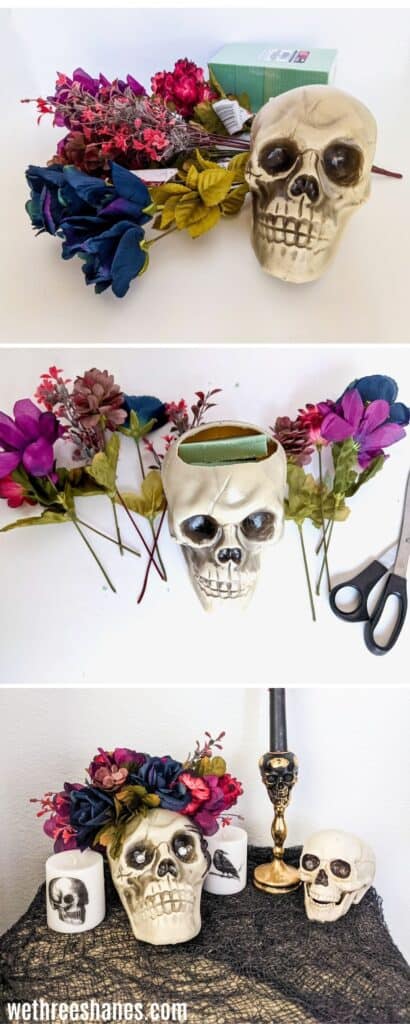
Supplies Needed to Make a Skull Floral Centerpiece:
There are tons of places you can get the supplies for this skull craft. Kim and I both made one and Kim got all her supplies from the Dollar Store so her skull cost $7 and she had lots of flowers left.
- One Plastic or Foam Skull
- Flower Foam – unless using a foam skull
- Flowers of Your Choice
- Extra Embellishments if you want
My skull is a foam one so I didn’t need to buy flower foam. The skull from the Dollar Store is hallow so you need the foam for it.
You might need glue but only if you use embellishments. Kim added a spider and rhinestones to hers and used a glue gun to stick them on.
How to Make a Floral Skull
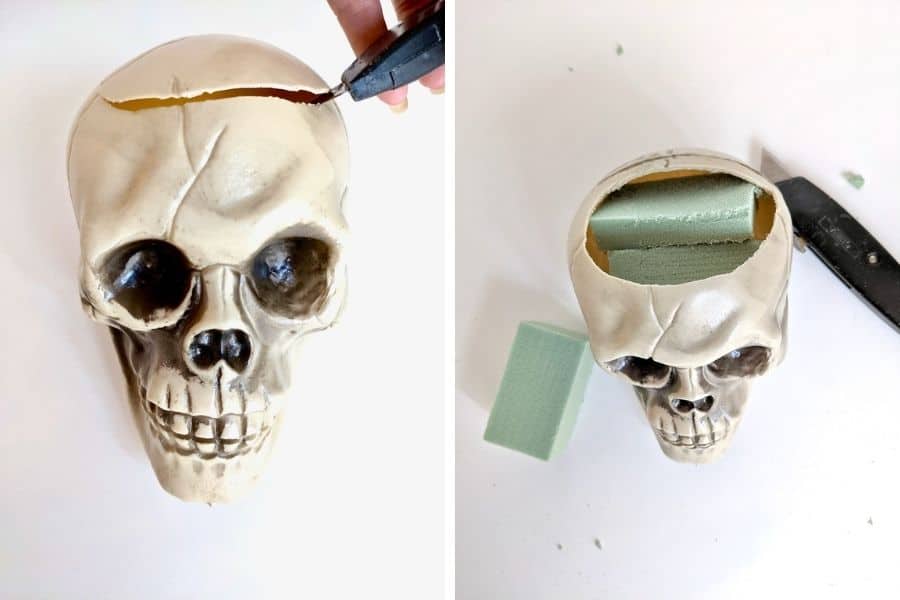
Step 1. – First step is to cut a hole in the top using an Xacto knife or scissors. This is pretty easy to do but still watch your fingers.
Step 2. – Next you’re going to fill the skull with the foam again so cut into smaller pieces to fit inside.
Step 3. – Once you get the foam in you are going to take flowers and start poking them into the foam. Arrange however it looks best. Again you can use glue if they are not staying in place. Kim said her’s stayed just fine without glueing them into place.
Step 4. – Glue on embellishments if you are using them.
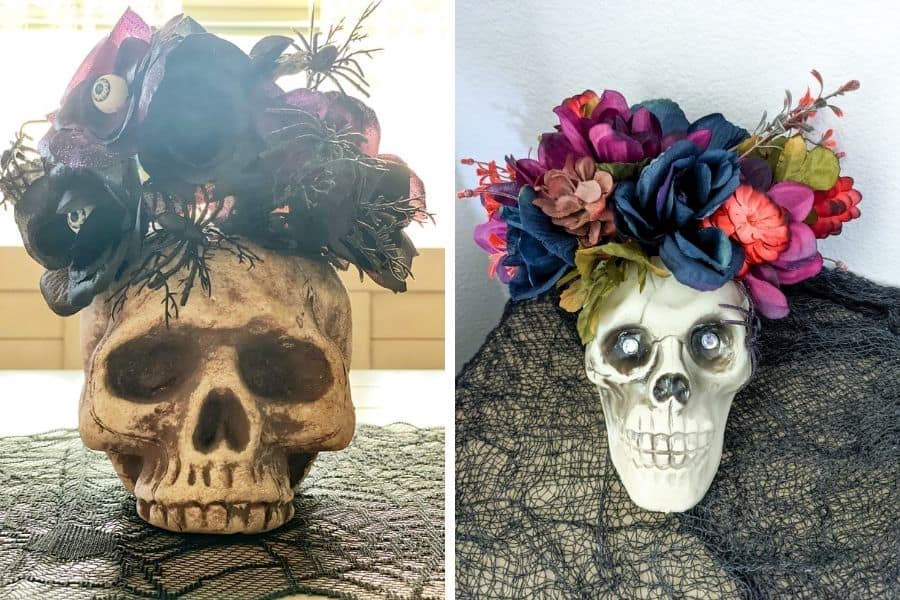
Mine was actually made out of one of the foam skulls from Michaels. Because mine was made out of foam I just stuck my flowers directly into the skull. I added hot glue to keep them in place.
I love the look of these DIY floral skulls. Kim and I each made our own. Which one do you think turned out better? It’s okay, I won’t tell Kim you said mine was better.
DIY Jewel Skull
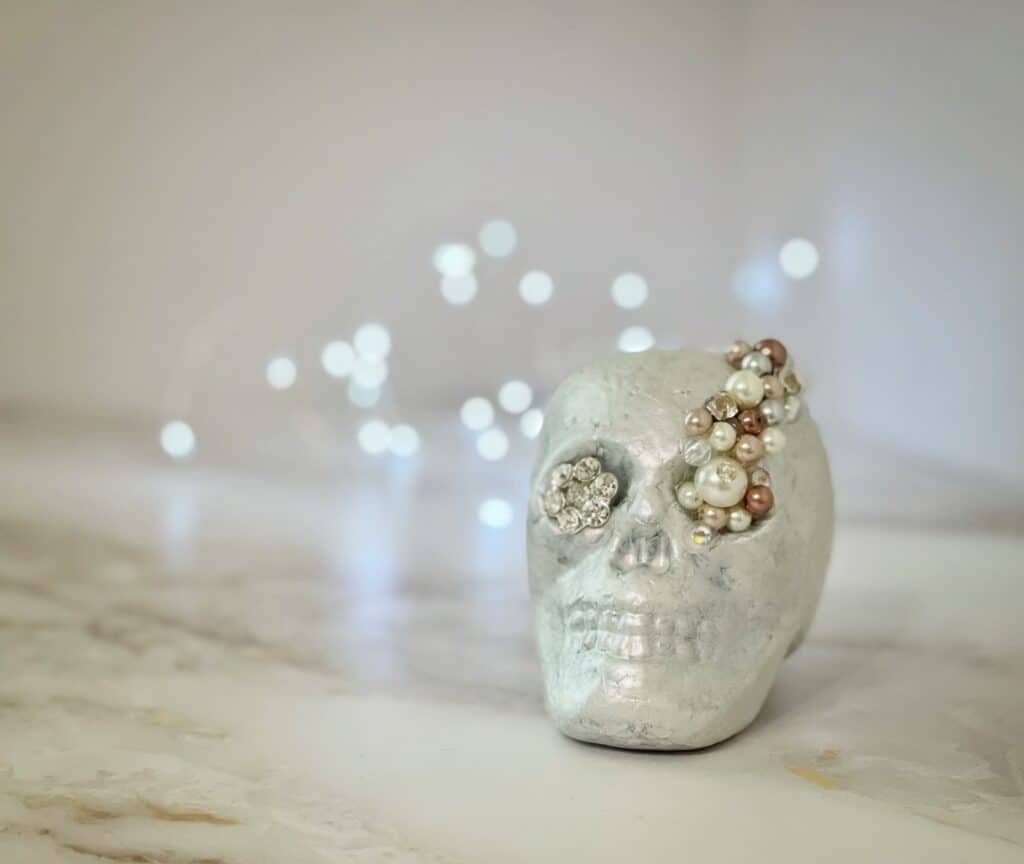
For our last skull craft I am using a small foam one from Michaels. However, you can use any size and it can be make out of any material. Foam, plastic, glass…anything will work.
Here’s What You’ll Need:
- Paint
- Bling – can be beads, rhinestones, buttons, small flowers
- Glue – craft or glue gun
How to Give Your Skull Some Bling
This is such a simple skull craft and you can be as creative as you want with this DIY. I’ll give you the steps I took to make my skull but you can glue things however you want.
Step 1. – I painted mine with the metallic paint again to give it some sheen.
Step 2. – Next you want to find some beads and bling. You can get creative with this one. For the left eye, I actually used a fancy button. Just start hot glueing things where you want them.
My skull was on the smaller side so it didn’t need a ton of pearls or bling. The bigger your skull head, the more you need to glue on. Mine was perfect because a few more and it would have been too top heavy to stand up on its own.
The best thing about all three of these skull heads is that they are so easy, cheap and you have complete creative freedom to fix them up however you want to. Most, if not all of these items we used were from the dollar store. You just can’t beat that.
You could easily combine the ideas you see in all three skull crafts into your own idea. Use multiple succulents one a bigger skull instead of flowers or bling out either of the two first skull crafts if you like more bling.
It’s so easy to customize the look of these DIY skulls so they fit the vibe of your home this Halloween season. They look great on their own but also look good with all your other Halloween decor.
Are you planning on making any of these skull heads for halloween? We’d love to hear about it in the comments. Tell us which you plan on making.
You Might Also Like:
Halloween Table Runner
Halloween Printables
Fake Candelabra Out of Toilet Paper Rolls
Easy Pumpkins our of Toilet Paper
