DIY Magnetic Poster Hanger Using Dollar Tree Supplies
Make your own DIY Magnetic Poster Hanger with Dollar Tree supplies. This budget friendly frame makes it easy to swap photos for year round holiday and seasonal decor.
(THIS POST PROBABLY CONTAINS AFFILIATE LINKS. OUR FULL DISCLOSURE POLICY IS LONG & BORING BUT, YOU CAN FIND IT HERE.)
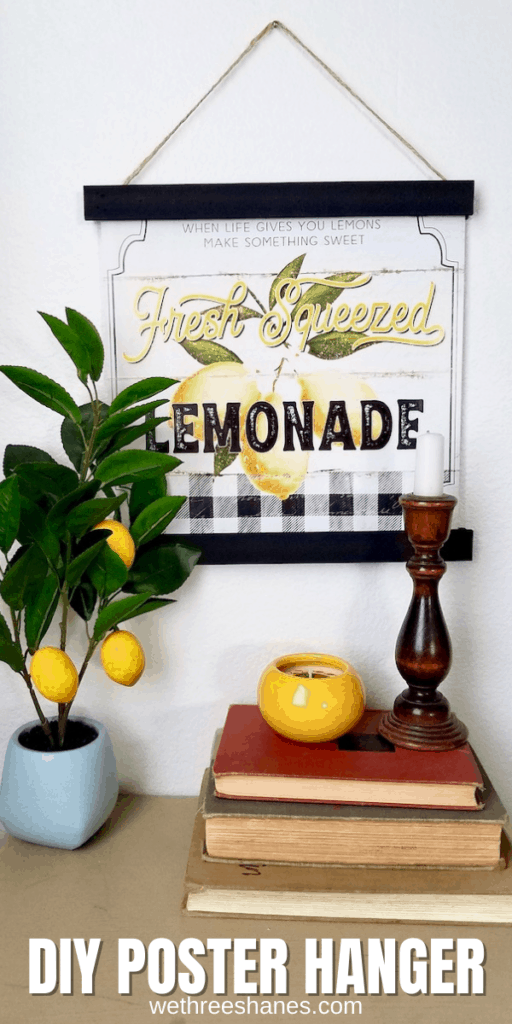
DIY Magnetic Poster Hanger Dollar Tree Decor
If you can’t tell already, I really like art work and decor that is interchangeable. My house is pretty small so I don’t have a ton of storage. When magnetic poster hangers became popular a couple years ago, I knew I needed to make some for my home.
Fast forward a couple years later and I’m only now DIYing my first set. The Dollar Tree calendars this year are absolutely adorable so I’ve been turning them into budget friendly decor all week. Since I don’t actually use a wall calendar, I needed a different way to get those cute photos up on my wall.
Enter the DIY magnetic poster hanger! I walked around the Dollar Tree a bit trying to find the best supplies to make a photo frame and here’s what I came up with:
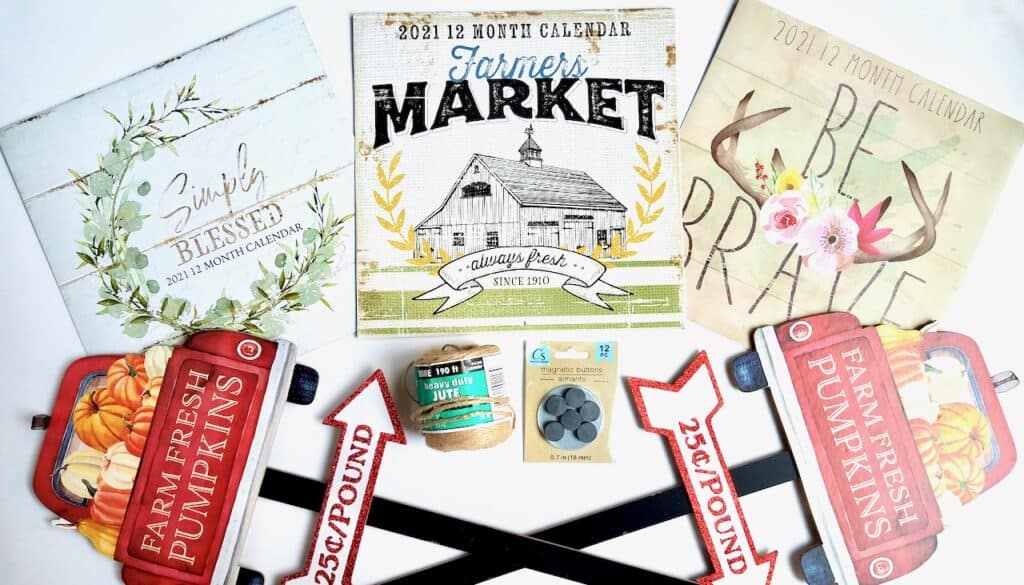
Obviously, you don’t need to buy 3 calendars. Since I’m doing calendar crafts all week, I wanted plenty of pages to work with but for this project you only need one. The middle calendar is my favorite for this project! It’s got such great farmhouse photos but honestly they’re all great!
Supplies Need to Make a Dollar Tree Poster Hanger
You only need a couple of dollar store supplies to make these frames. The Dollar Tree usually has cute signs on sticks during holiday seasons which is pretty much all year for them. I’m sure they look cute in a planter with flowers but that’s not what we are using it for today.
We just need the sticks so you’re going to rip off the extra stuff. There are always a couple of styles to choose from so just pick your favorite while making sure the sticks are longe enough. I thought these trucks were adorable so even though I’m taking them off, they might be great for another project.
- Two plant decor sticks
- Dollar Tree Calendar
- Magnets
- Paint – color of your choice
- Twine or ribbon
- Glue – E6000 works best but hot glue will also work
- Hand saw – the Dollar Tree has these too!
- Pliers
- Sandpaper
I spent $4 dollars because I already had the paint, twine, glue, saw and sandpaper at home. If you had to buy everything then it will be closer to ten bucks, not counting the pliers.
You can consider buying a furring strip from Home Depot instead of the plant decor sticks. It’s an extra trip but will cost about the same price. They can cut it to size at Home Depot but the hand saw will work just fine.
Last week when I was at the Dollar Tree they were out of magnets. Yesterday, they were back in stock.
People are crafting like crazy right now and supplies are flying off the shelves. If you can’t find something this week then buy what you can and then check back a week later.
The magnets from the Dollar Tree come in a pack of 12. You’ll only need 8 for this craft but I’ll be using more magnets on Friday’s jenga block craft and I used some on Monday’s project as well. Consider getting a couple of packs for using on other crafts.
How to Make a Magnetic Poster Hanger
This project is the easiest of the week. It only took me about 30 minutes to complete and that included paint drying.
Step 1 – Start by carefully ripping the pieces of decor off of the sticks. The set I chose was only held on by small pins and came off without much effort. Save the extra pieces for another project.
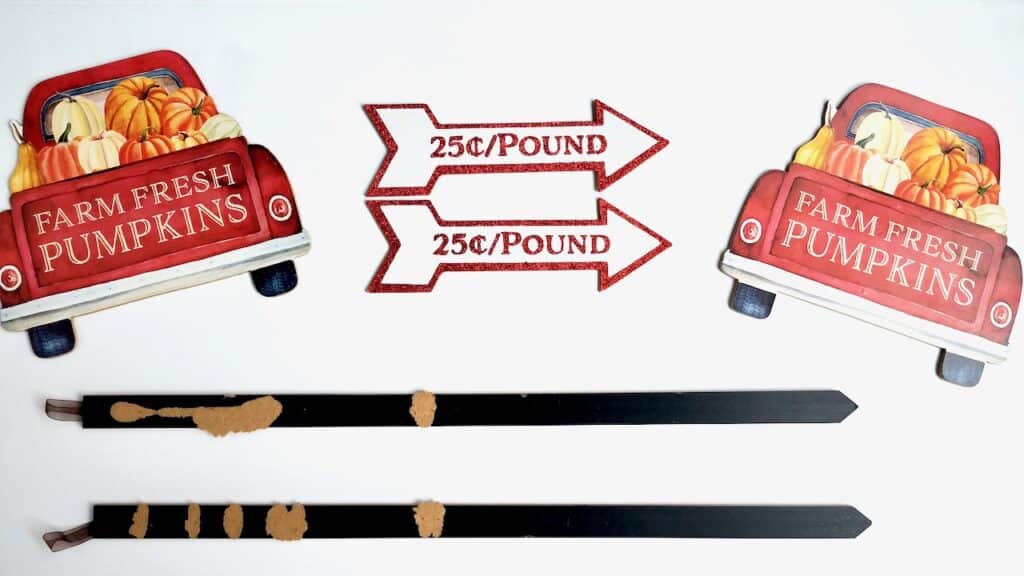
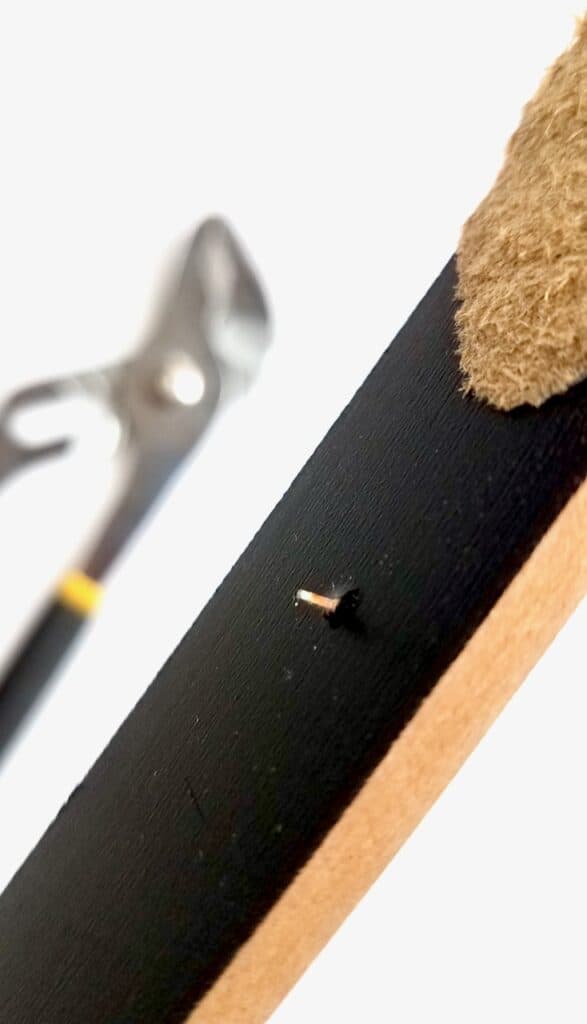
Step 2 – You’ll be left with some beat up looking sticks. First, you need to take the pins out so you don’t poke yourself. Grab some pliers and pull. They should come out pretty easily.
If any nails break off instead of coming out of the wood then sand them down. I had one break pretty close to the surface and after sanding I no longer noticed it.
Step 3 – Pick off as much of the wood composite left from the backs of the decor and then sand down the edges to make sure none is sticking out past the edge. These don’t need to look perfect because they will be the inside of the poster hanger so you won’t see them. You’ll be using the smooth, brown side as the outside of your magnet frame.
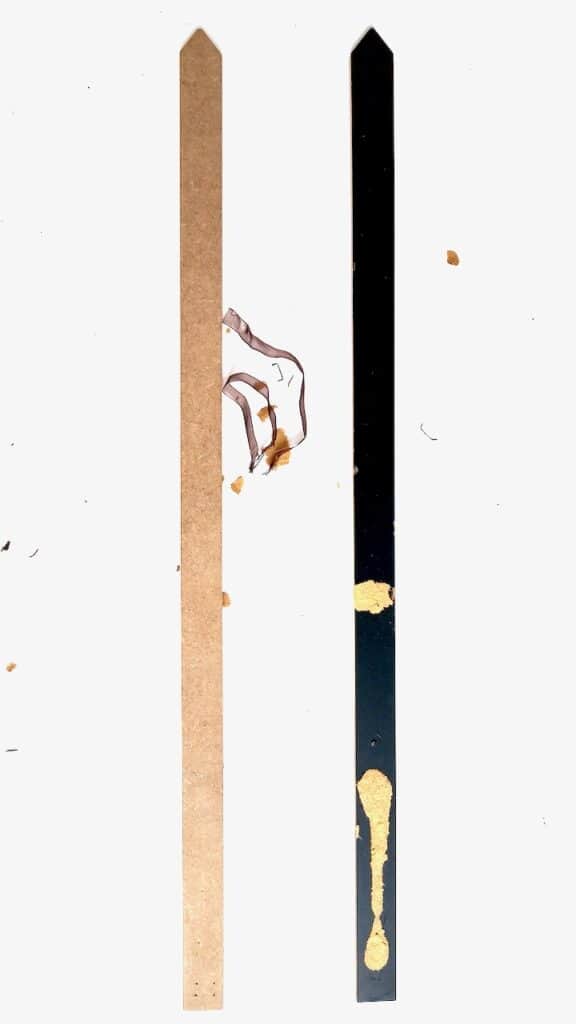
Step 4 – Find the middle of your sticks so you can cut them in half. You’ll be leaving the point part of the sticks but they will be the back of the poster frame so you won’t notice them.
I used my miter saw to cut these but they do have small hacksaws at the dollar store that will have no problem cutting right through these sticks.
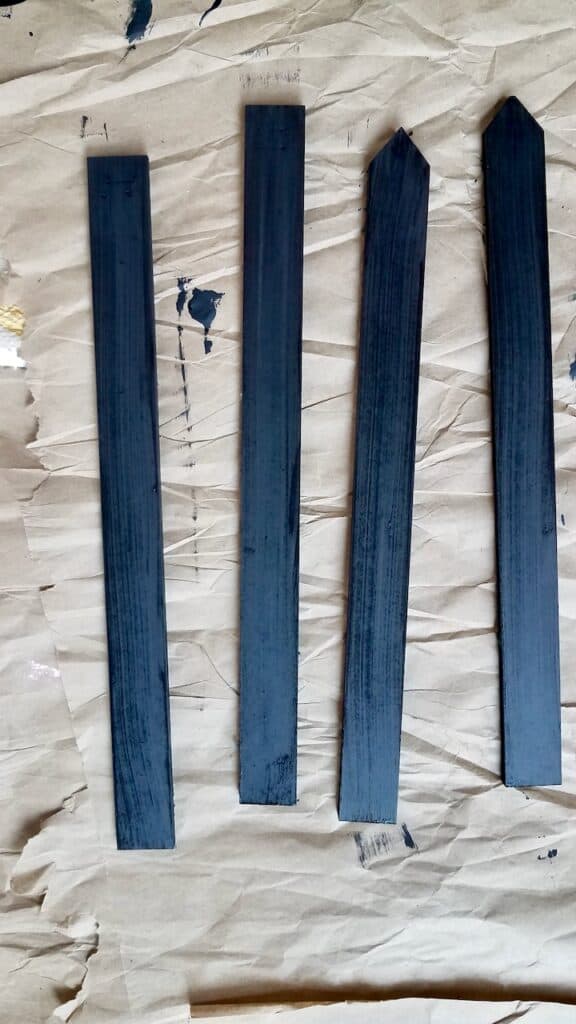
Step 5 – You should have 4 even length sticks once they are cut. Now, you need to paint them. Paint all the edges and the brown side of the sticks. There’s no need to paint the inside because they are already mostly black.
If you plan to use a different color, then you might need to paint the inside. Black works best for my house and looks great with the photos in the Farmer’s Market Calendar. If you pick a different calendar to work with, then you might want to try another color.
Step 6 – Next, it’s time to glue the magnets and twine in place. The Dollar Tree Magnets are already in stacks of two which is exactly what we want.
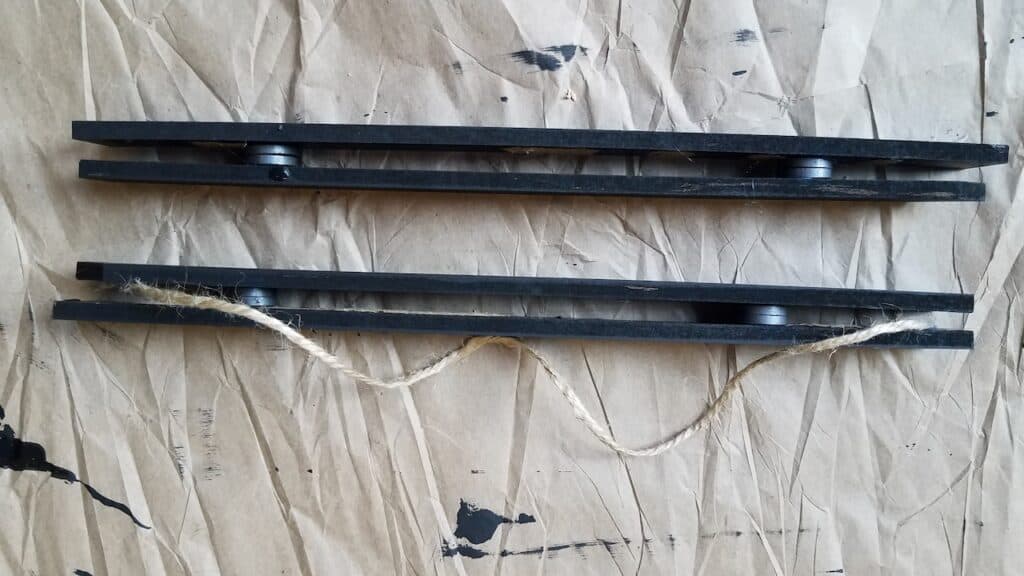
Take the stack of two magnets and glue it to the left side of the front, top stick. Do the same thing to the front bottom stick and then to the right sides as well.
It’s also time to glue the string on while the sticks are apart. You need to glue the twine on each of the top sticks. One end piece on the left side of the front stick and the other end on the right side of the back piece. Check out the photo below if reading this doesn’t make sense.
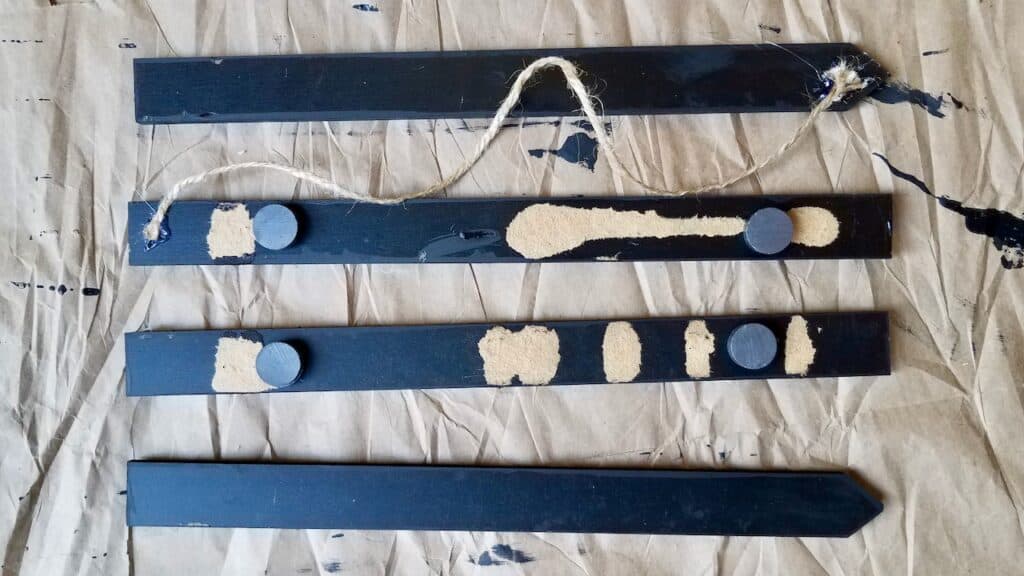
Glueing the twine on the DIY Poster Hanger this way helps distribute the weight of the poster so it hangs more evenly.
Keeping the magnets stuck together will make sure they line up when the frames come together. Once the glue has dried on the magnets you need to put more glue on the side of the magnets that are sticking up.
Then, carefully place the back wood stick on the magnets to glue them on. Make sure everything is lined up well before you press the stick onto the glue. My photo makes it look like my point ends are hanging over the front sticks but they aren’t. It was just the camera angle.
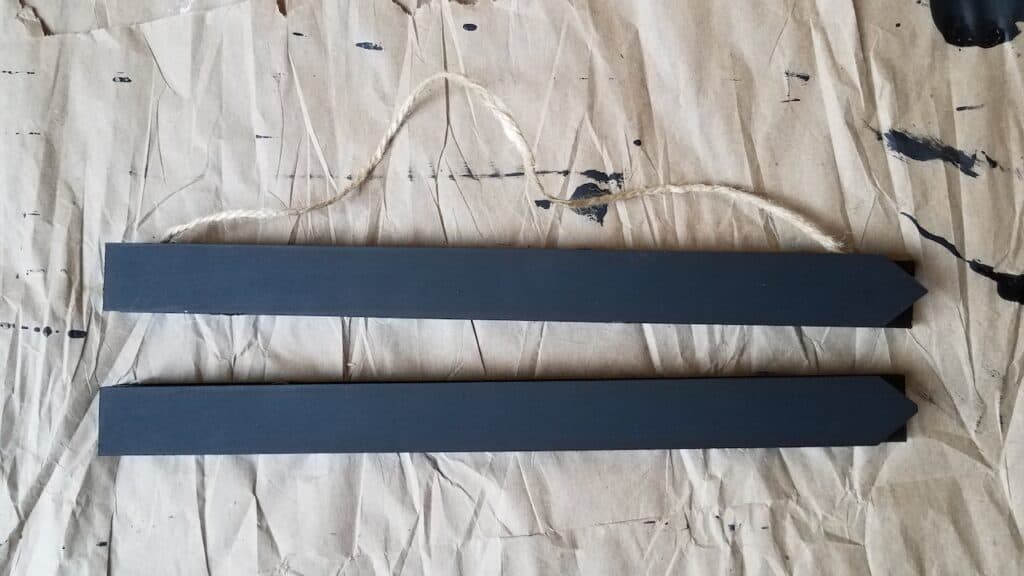
Here’s a side view of what the magnet frame looks like. It’s a little bulky but you don’t really notice that when it’s hanging up.
…And It’s Done!

I feel like that seems like a lot of instructions but once you work on it you’ll see how quickly the whole process goes. Now, all you need to do is pick your favorite dollar store calendar page and hang it up.
The Dollar Tree magnets are quite strong so they have no problem holding the calendar pages. Since you’re using a calendar, there are photos for all year round. Just look at how cute some of these calendar pages are?

Continue to swap out photos and prints as often as you like. You don’t have to use the calendar pages if you don’t want to. We have fun printables in our resource library that would work too.
DIY Magnetic Poster Hangers would also be great for displaying kid’s art work. Kids can swap out art work all the time because the magnet frames are so easy to use.
Make one Poster Hanger or make a bunch! These would look great hanging as a set. DIY magnet frames are so practical and can be used in so many ways. You won’t be sorry you made some.
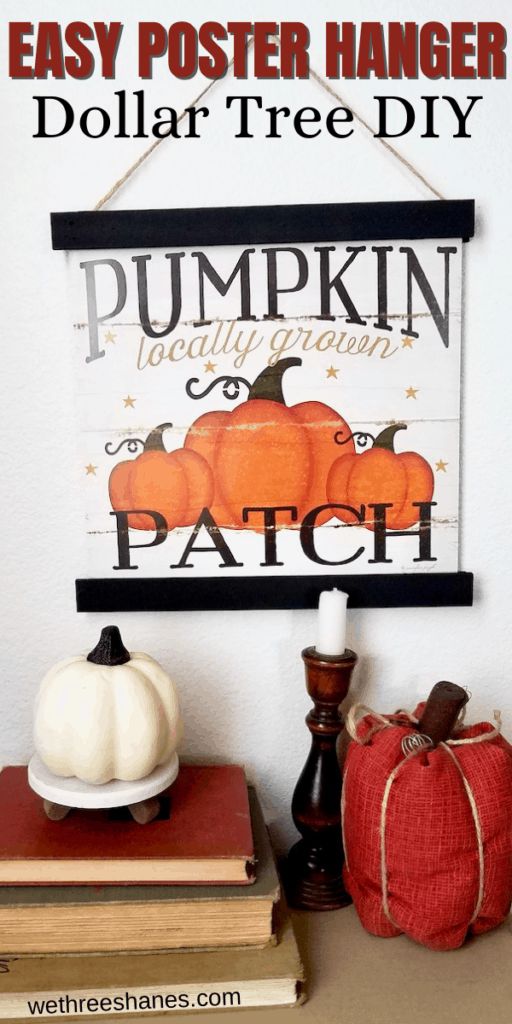
I can’t wait to swap these out for some easy holiday and seasonal decor! I’m so happy I finally DIYed a poster hanger and making them from dollar store supplies made this project an easy one stop shop.
If you liked this craft then make sure to check out our other Dollar Tree calendar crafts happening all week.
Do you think you’ll be making a DIY Magnetic Poster Hanger for your home? I promise it’s a super simple craft and will look great in any home!
