DIY Charger Plate Decor Dollar Tree Craft
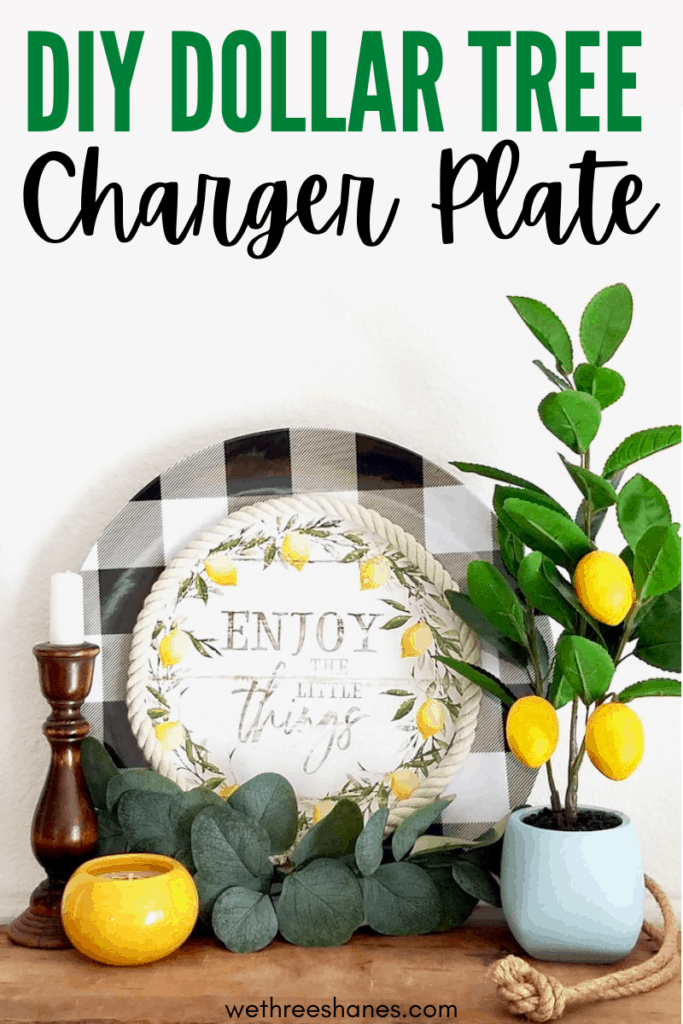
Turn a Dollar Tree, buffalo check charger plate into charming farmhouse home decor. This budget friendly craft is a super simple kitchen accent piece.
(THIS POST PROBABLY CONTAINS AFFILIATE LINKS. OUR FULL DISCLOSURE POLICY IS LONG & BORING BUT, YOU CAN FIND IT HERE.)
DIY Dollar Store Charger Plate Craft
Another day and another Dollar Tree DIY. Today I’m using a really cute buffalo plaid charger plate along with a calendar to create some custom, farmhouse, kitchen decor.
The Dollar Tree just recently came out with a whole section of buffalo check items. Basically, I wanted to buy everything but I was good and only walked away with one charger plate. I knew I could turn this into something cute for my kitchen.
Quick Update Here: I get a lot of questions through out the year about the buffalo plaid charger plates. People have a hard time finding them.
That’s because the Dollar Store only brings them out in towards the end of the year. I was just at my Dollar Tree last week, 9-6-22, and they had a huge stack of them. So, now’s the time to buy one or else you’ll have to make your own or wait until next year. Last year they were only out for Christmas so if your Dollar Tree doesn’t have them yet then keep checking back.
The calendars usually show up in December. They are always changing but always cute!
This DIY Charger Plate Decor craft is super customizable which I love because you can decide what will look best for your space. Of course, I will also make it adaptable so you can switch up the theme as different holidays and seasons roll around.
Let’s get crafting!
Supplies Needed for Charger Plate Decor
Most of the supplies needed came from the Dollar Tree but I also grab some eucalyptus leaves from Walmart. Obviously the dollar store has some pretty great floral too so you can definitely get it from there.
I just love the way the eucalyptus adds farmhouse flare and it works with all six calendar pages I’m using. It’s not pictured below because I bought it a little later once I knew for sure I wanted to add the leaves to the charger plate.
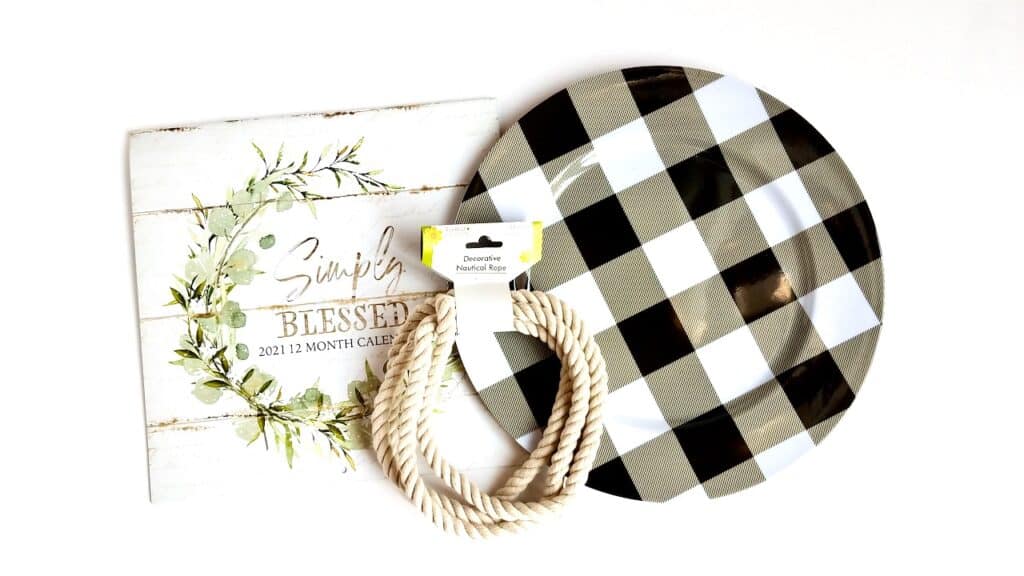
- Dollar Tree Calendar – I used the Simply Blessed calendar for this project
- Buffalo plaid charger plate
- Nautical Rope
- Floral
- Craft or hot glue
- Scissors
Since I have glue and scissors at home I only spent $4 on this dollar store craft. Not bad considering I get adorable decor that works all year round.
The Dollar Tree tends to keep craft rope in the floral section year round. However, it’s great rope for a dollar so they have a hard time keeping it in stock. If you don’t see it when you go, try again in a week or try calling in to see if it’s in.
I went one week and it was all out of stock. I went 5 days later and there was one there. That means they restocked and sold out again in less than a week. Crazy! It’s totally worth it to keep checking in and get the rope from the Dollar Tree because you can not beat that price!
How to Decorate a Charger Plate
This is a pretty simple project. You basically cut out the calendar pages you like to fit in the middle section of the charger plate. You glue the rope around the middle edge and add some floral to the bottom. Let’s break it down just a little.
- Grab a sheet of white printer paper. Press it down as best you can into the middle of the charger plate. There is a pretty obvious middle section. Using a pencil, trace around the indent of the plate.

2. Cut the piece out and fit it back into the middle of the plate. Now, grab your glue and rope. Glue small sections of the rope down to the edge of the middle lip on the charger plate. You want the rope to go around the paper without any plate showing through. You also don’t want to glue the rope to the paper.
Don’t cut the rope to length until you get it almost all the way glued down. We want to stop as much unraveling as possible so, once you cut, glue the end pieces down as quick as you can.
3. This part is a little hard to explain so I hope I make sense. Read the whole section to make sure you get it right. Because we’re doing all of this by hand, you might have small inconsistencies in your cuts and glueing.
Once you pop that paper circle out, you need to know the correct direction to place it on the calendar pages before you trace and cut them out. This will insure that the calendar pieces fit correctly in the center of the charger plate without bumps or plate showing through.
You need to decide where you’ll glue the floral on the plate before cutting out the calendar pieces even though we won’t glue it down until a little later. The floral will be glued to the plate where the rope comes together to help hide the bit of fray. You’ll need to mark this spot so you know the correct way to place the paper circle on the calendar pages to trace.
For example, I wanted my floral on the bottom of the charger plate. I turned the plate so the frayed rope was at the bottom and then marked that spot with an X. Then, I put the X on the bottom of the calendar page before tracing it.
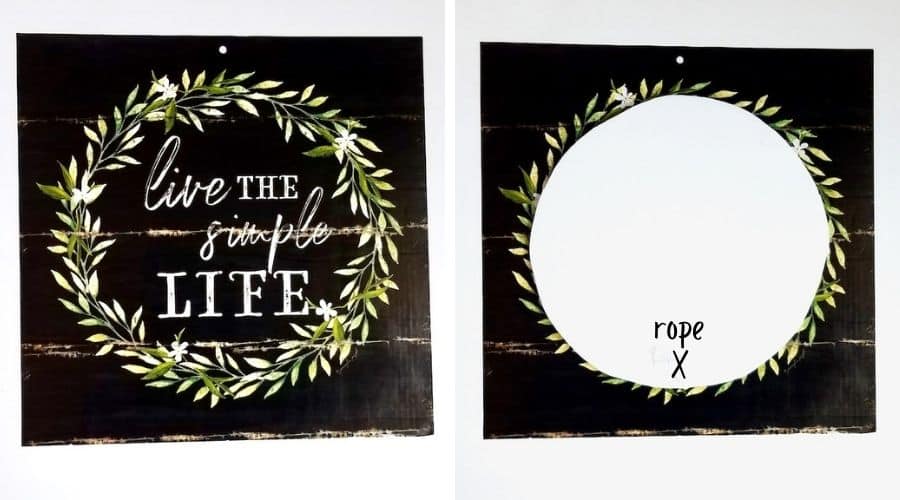
However, you can put the floral anywhere on the charger plate. Maybe you want it on the top or the side of your charger plate. Say you chose the upper left side of the plate for your leaves. You’ll make sure to turn the plate so that the frayed rope is on the upper left side and mark it. Then your paper will look like this.
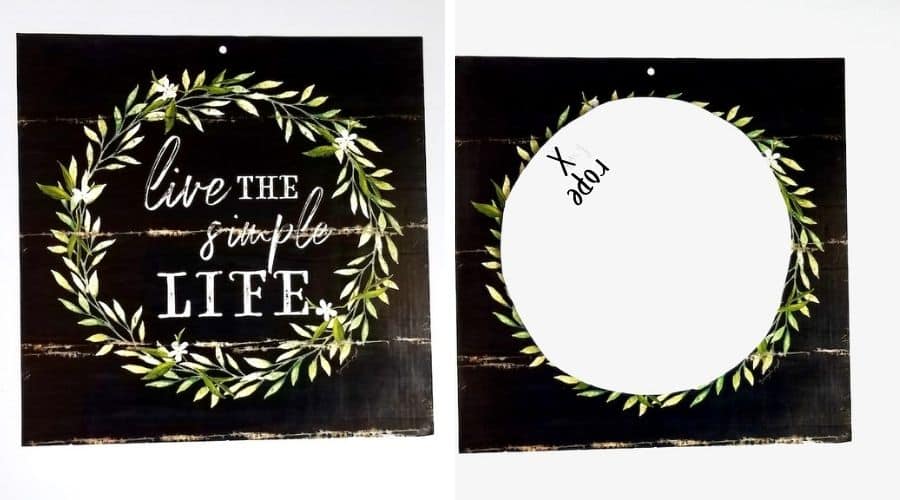
4. When you set the paper on the calendar page make sure that mark is turned the correct way on the calendar page. Continue with the tracing process on all the calendar pages you want to use. I choose 6 pages to use because I think they will cover most seasons of the year.

5. Now that you have your Dollar Tree calendar pages cut to size, you can carefully pop each one into the center to make sure they fit correctly. You might have to trim an edge here or there.

6. You can stop there if you want, but I chose to add some floral. Floral makes everything look a bit more complete. Glue the leaves down where ever you decided to place them. Remember, I chose the bottom but you don’t have to.
You just want to make sure you are covering the end parts of the rope so you don’t see the slight unravel. I used hot glue on my leaves but the hot glue actually melted the plastic stems a bit which made the placement go a little wonky. If I could do it again, I’d use E6000 for this part.
7. You’re basically done. Just decide which center piece you want to display for now.

Interchangeable Charger Plate Decor
You can choose to use one calendar page for your DIY Charger Plate Decor and not worry about the rest. I just think it’s great to be able to switch things up during the holidays.
The best part is that the calendar pages are pretty thin so they can all fit together in the middle of the charger plate. Then, when a new season comes up, take them out and put the next sheet on top. Holiday decor with out needing storage is always a win.
I got excited to see how some of the centers would look with seasonal decor so I quickly set some up. Look how cute these look!
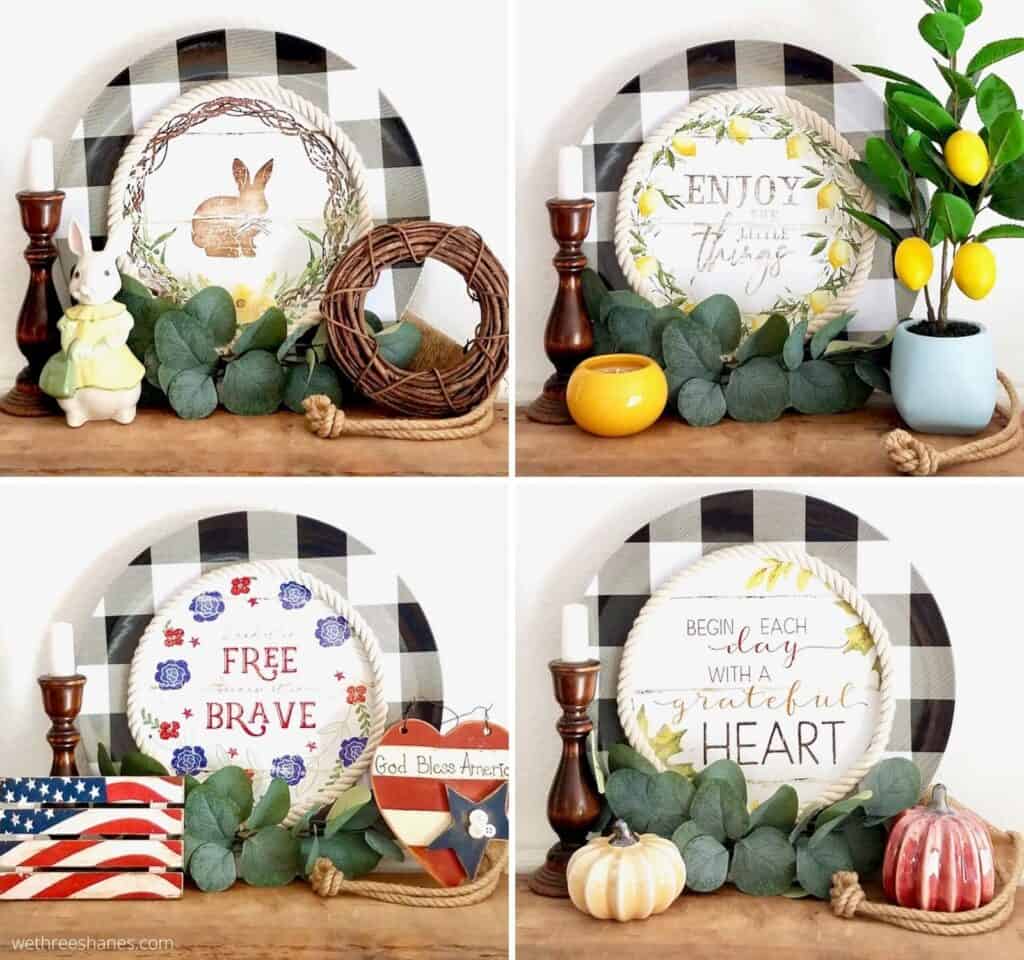
Basically, I’m obsessed with all of these but I think the Easter decor is my favorite. It’s so sweet! I’m also excited to see how the Christmas and Valentine’s centers look but I’ll have to wait to set those up.
Do you have a favorite? Let us know in the comments!
*If you liked this DIY Charger Plate Decor craft then make sure to check out our other Dollar Tree Calendar crafts from this week:
- DIY Wood Bead Sign Using Dollar Tree Supplies
- DIY Wood Slat Sign Using a Dollar Tree Calendar
- DIY Magnetic Poster Hanger
If you like this DIY Charger Plate Decor craft then Pin it! It will help others find this craft and we really appreciate it!
