
Decoupage Wood With Napkins Dollar Store Craft
Learn how to decoupage wood with napkins using these helpful tips! Plus make these adorable mod podge crafts using Dollar Store supplies.
(THIS POST PROBABLY CONTAINS AFFILIATE LINKS. OUR FULL DISCLOSURE POLICY IS LONG & BORING BUT, YOU CAN FIND IT HERE.)

How to Decoupage Wood With Napkins
Yesterday I was at the Dollar Store and saw all the cute summer napkins they have. I seriously wanted to buy them all but didn’t really have a reason to. As I continued shopping I noticed a huge section of wood craft supplies and immediately new what I was going to do with all those cute napkins. I was going to decoupage the napkins onto the wood.
Learn how to decoupage napkins onto wood with these helpful tips and tricks. Mod podge is an easy way to add character to any piece of wood. You can try the dollar store crafts I’m going to show you today or use this decoupage tutorial to update an old piece of wood furniture. There are tons of creative possibilities when using mod podge.
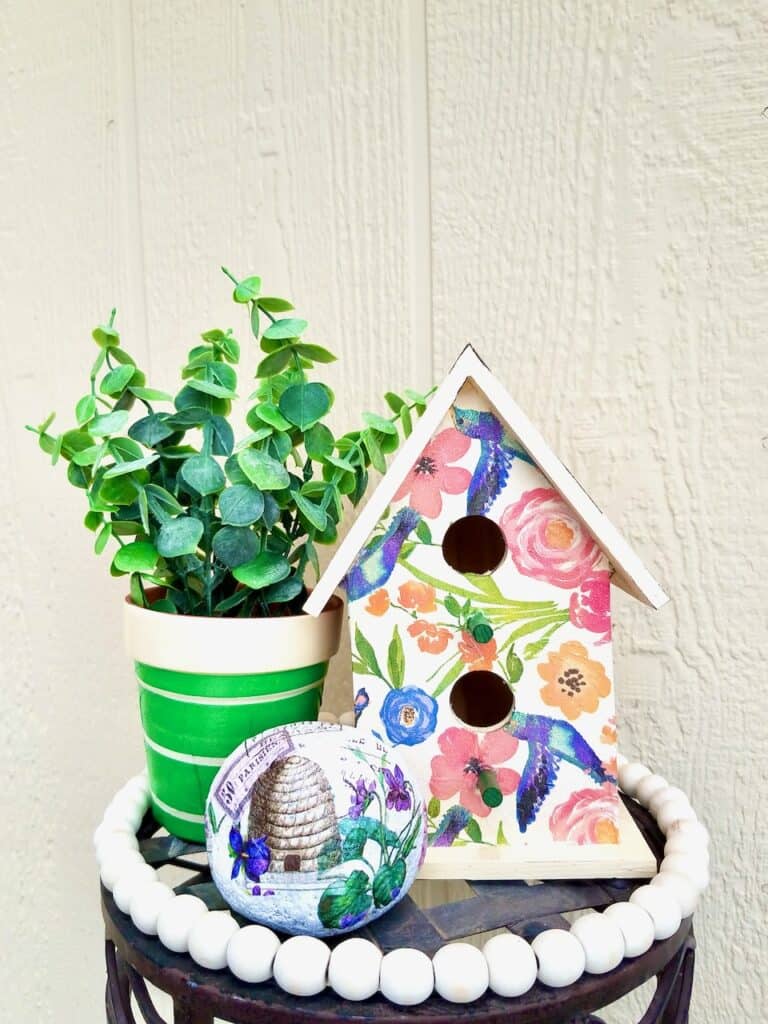
If you like these decoupage crafts then check out our decoupage birdhouse tutorial, decoupage rocks tutorial, and decoupage terra cotta pot tutorial too!
Decoupage Craft Using Dollar Store Supplies
The amount of awesome wood supplies at my dollar store made it hard to choose a project to mod podge, so I ended up with 3. That just meant I got to pick 3 different napkins to use too, so I was really excited.
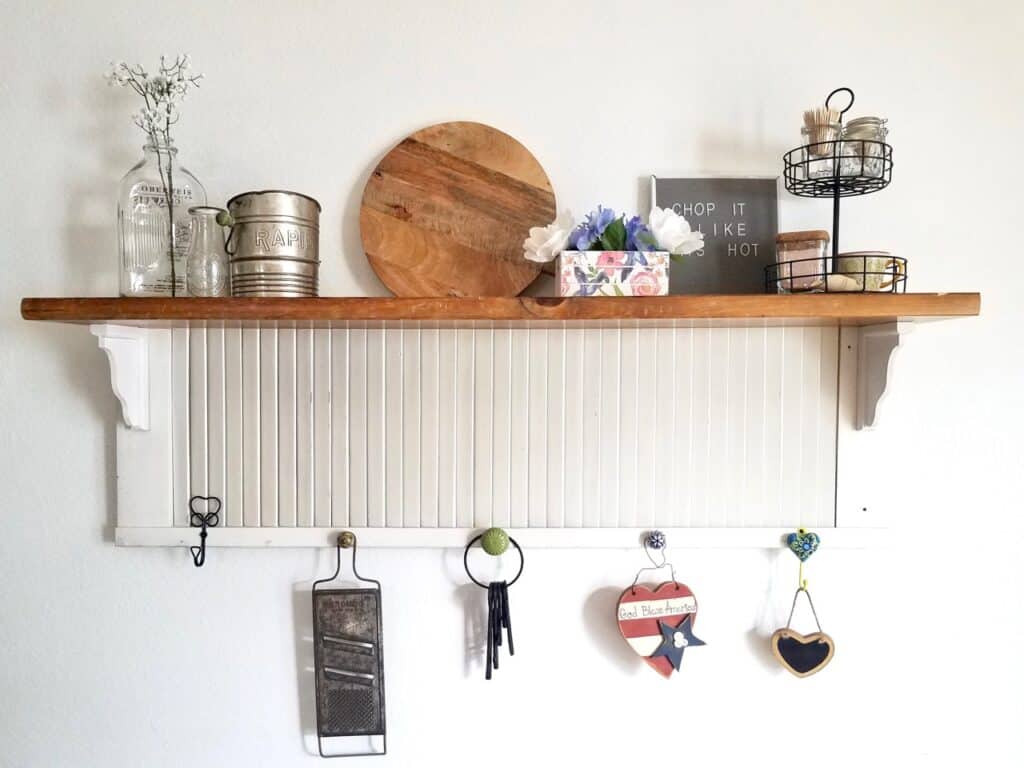
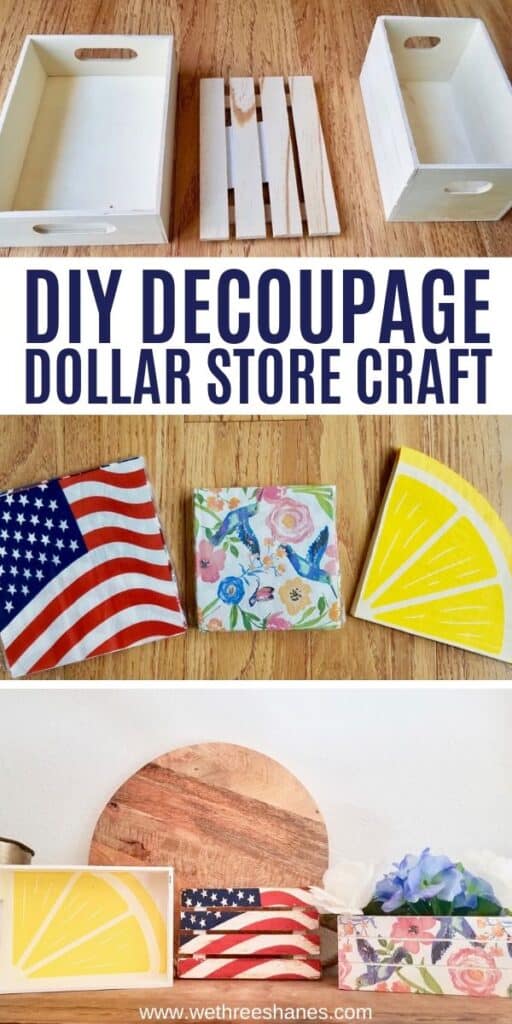
All of the wood crafts I got are on the small side so they will be easy to find a space for them in my house once they are finished. I love to DIY small items that can easily be tucked on a shelf for added character or won’t take up much room in storage. The wood crafts I ended up grabbing were; a super adorable mini create, a mini pallet, and a mini tray to decoupage.
Here’s a little preview of the mini crate up on my kitchen shelf. It was easy to throw it up there because it was so small.
The Dollar Store napkins have a spring and summer theme right now but I’m excited to go back through out the year to see what other napkin patterns they have to use for decoupage. I definitely see some seasonal/holiday decoupage projects in my future.
In fact, I left the other side of the crate blank so I can decoupage a fall napkin on the other side once they hit Dollar Stores. Then all I need to do is turn the crate around and put some fall colored flowers in the crate. I love an easy craft that can be used for more than one season.

What is Decoupage?
This day and age I feel like most people know what decoupage is. The simple definition is to glue cut out paper to a different surface such as glass, wood, or plastic. The word decoupage itself comes from the French word decouper which means to clip or cut up.
You might hear people interchange the word decoupage for mod podge. Mod podge is the glue/sealer that is used to decoupage. The name mod podge actually comes from the combination of the two words modern decoupage.
There are so many materials that can be used to decoupage. I’m using dollar store napkins for this craft but you can use tissue paper, magazine clippings, newspaper, fabric. The list goes on. You can decoupage onto so many surfaces as well.
There’s lots that can be done with decoupage. It’s definitely not a lost art form.
Supplies Need to Decoupage Wood With Napkins
There are a couple of supplies you need to make this Dollar Store decoupage craft. Most of it you can pick up from the dollar store.
You’ll need:
- one wood item
- one set of napkins
- sponge paint brush
- mod podge or glue to make your own
- a pair of scissor
I made my own mod podge by combine equal parts of dollar store glue with water. This is an ok substitute for mod podge but it won’t hold up as well as the actual stuff. Using the homemade stuff for this project felt fine to me but for bigger projects like decoupaging furniture, I’d use the name brand stuff.
How To Mod Podge With Napkins
There is more than one way to mod podge with napkins but I’m going to use the traditional way. These 3 crafts are easy, even something you can do with your kids, and I think the normal method is the easiest.
- Start by prepping the wood you plan on decoupaging. Sand any rough edges away. Then, paint or stain your wood if you want to. The wood does not need to be painted. I like the look of the painted wood and went with white for all three projects.
- Next, prepare your napkins by peeling back the layers. There are three layers in most napkins but the dollar store napkins only had two. The mod podge will only work when using one layer of the napkin so strip the other layer/s away from the pattern piece.
3. Cut your napkin to fit the piece/s of wood it’s going on.
4. Using your paint brush, paint a thick layer of mod podge onto the surface you want your napkin to be on.
5. Carefully place your napkin on the mod podged wood. Slowly push air bubbles out starting at the middle and working out. You can use the paint brush to smooth things out or your fingers if you can be gentle. This part can be tricky depending on the project.
For me, the tray was the hardest because of the sides. It didn’t give me much room to straighten things out. The napkin is very delicate so go easy on it. It can tear. Some bubbles will go away as the napkin dries and pulls a bit tighter. Other bubbles will stay and that’s ok. It gives your craft an older, farmhouse look.
6. Now, set your decoupage crafts aside to dry.
7. The final step is to add another layer or two of mod podge to the finished project. The final top layers will help seal and protect your new decoupage craft from wear and tear.
How you finish each project might be a bit different. I used sand paper to rough up the pallet and the crate before I applied the final layer of mod podge.
Each craft I did was a little different so I’ll show you the extra steps I took with each one but these are the basic steps for any decoupage craft.
Lemon Tray Decoupage Craft
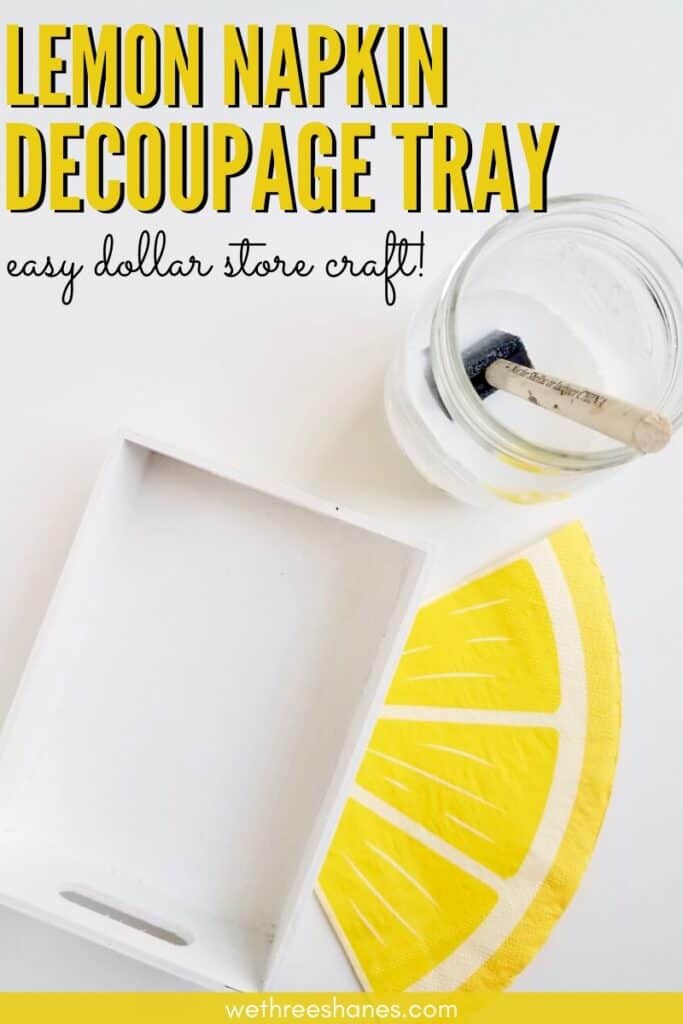
Let’s take a quick look at the lemon tray. This project had the least amount of steps.
Once the tray was prepped I placed the napkin inside to determine how I wanted to cut the lemon napkin down to fit the tray. Once the napkin was cut I peeled away the extra layer and I was all set for the mod podge.
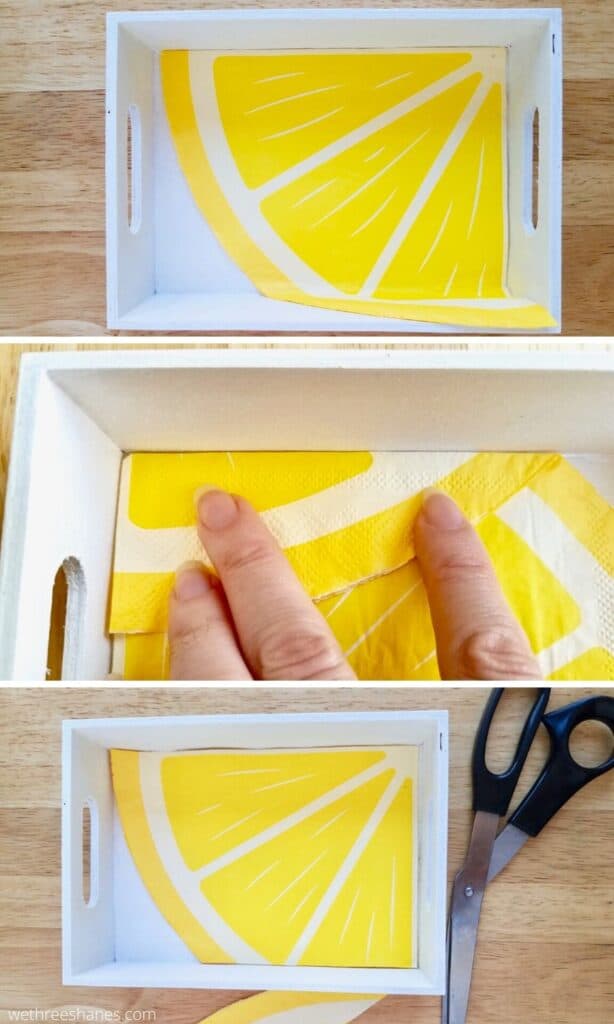
A thick layer of homemade mod podge was added to the inside of the tray and then, starting at the edge, I slowly lowered the napkin into place. Things were going really smoothly until I stopped half way through the process to take a picture. Opps!
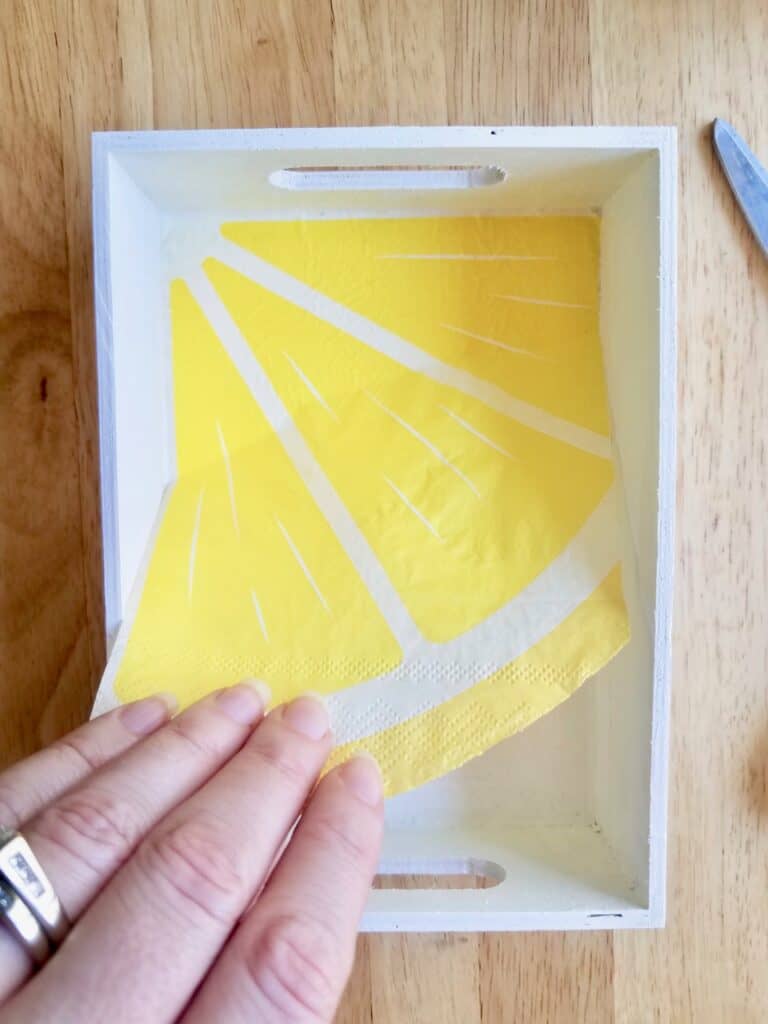
The napkin shifted a bit while I was snapping a pic and it was a little tricky getting things back on track. This is why you have to be so careful when placing your napkin onto the wood. Not all decoupage projects are this tricky but the napkins are super thin so they rip easier than fabric or thicker paper.
I smoothed everything out as best I could and then left it in the sun to dry. Then, I added two more layers of mod podge on and let it dry again. Because this is a tray, I wanted to make sure everything was really sealed since I’ll be setting things on it.
I think this one is my favorite! I love all things lemon and the white tray and yellow napkin look so good together. Since I only used one napkin for the project, I have plenty of lemon napkins left for another DIY project.

Crate and Pallet Decoupage Craft
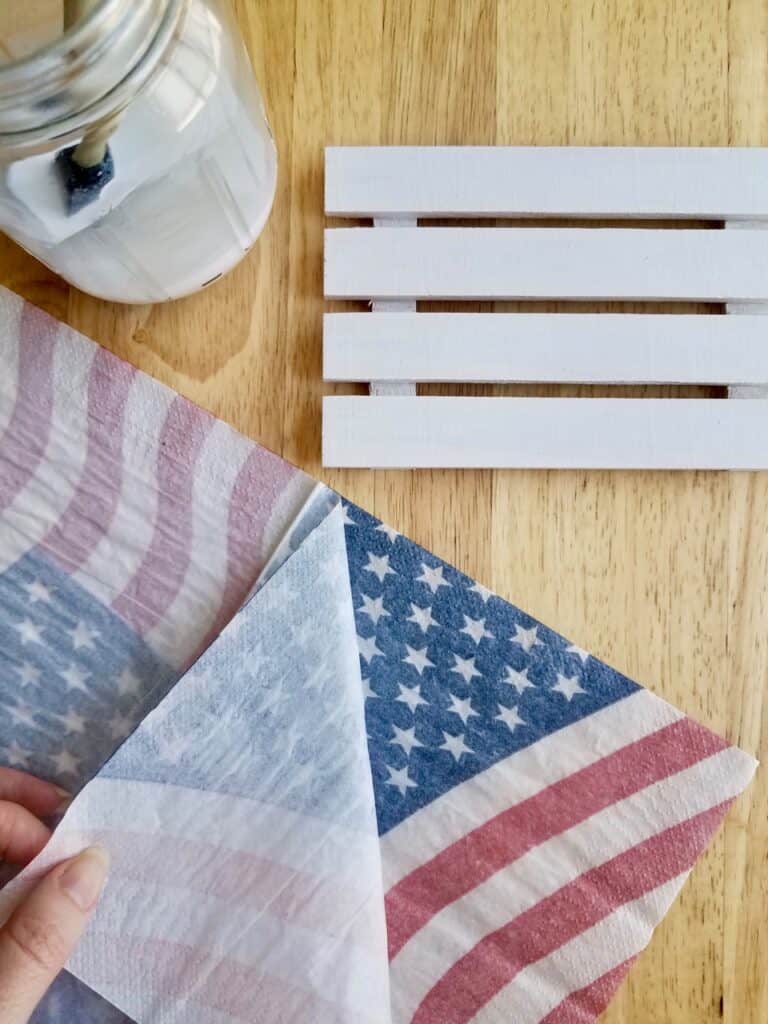
The next two projects were done in a similar fashion with one added step to the American Flag pallet. Just like above, I added a good layer of mod podge onto the surface of my projects and then smoothed on the cut piece of napkin to each. Then, they got set aside to dry.
I used one piece of napkin on each project and then I sanded away the extra napkin until slats were showing. You can always cut strips of napkin for each pallet or crate section and glue them on separately, especially if you want a cleaner look to your finished craft.
You can see the process in the photos below on the crate craft.
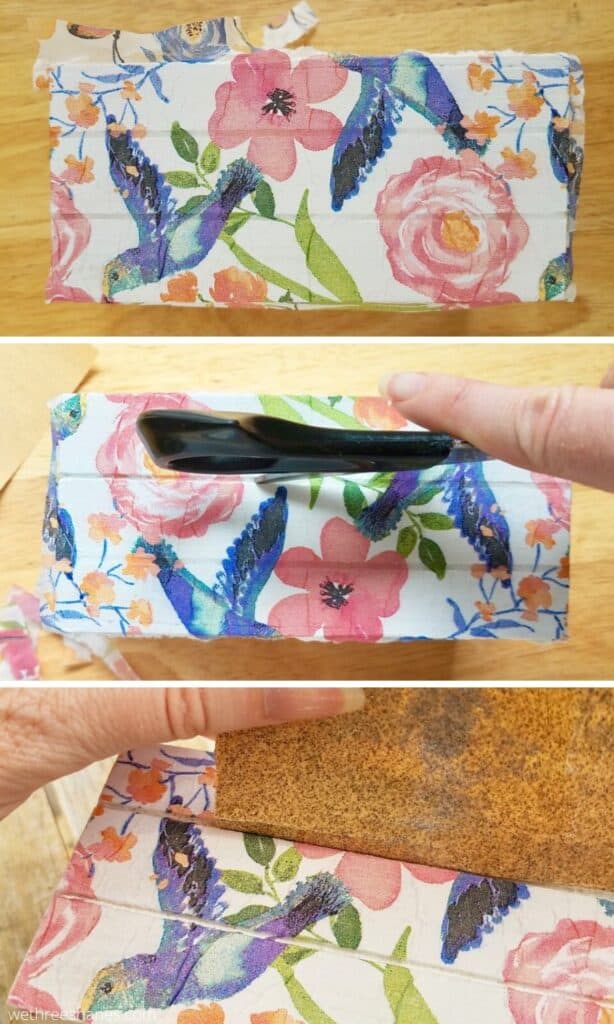
You can now seal your crafts with another layer of mod podge and set them aside to dry.
I added one extra step with the American flag pallet. Once it was done, I decided to add a bit of watered down brown paint to make it look a bit aged. This is an extra step that you don’t have to do.
You can see the before and after below. Both look great but I wanted to see the aged look. Personally, I like the aged one a little more because it fits better with the look of the decoupage.
This would make great 4th of July decor for your home or for a barbecue. Plus with all the wood projects from the Dollar Store, you can use up more napkins for more party decor. The chalkboard signs would look so good with the American flag napkins mod podged to them. Then you could write the menu on them.
Or you could use the leftover napkins for the party. Either way, you’ve got plenty to work with for little money spent.
Decoupage Napkins on Wood Crafts
It’s so easy to decoupage wood with napkins! Talk about a quick way to add a pop of color to your home.
The Dollar Store makes it even easier to make this craft since they have so many supplies to choose from at such a low price. You could pick one project and buy all the supplies and only be out $4. I already had the glue and paint brushes so each of these crafts were only 2 bucks!
I made the wooden pallet coasters but found that when I placed my cup of coffee on them the bottom of the cup would stick to the coaster. Is there something I can use on the top of the coaster to seal it and help keep my cup from sticking?
I haven’t used the wooden pallet one as a coaster before so I’m not sure what would make it not stick. I just prop the decoupage pallet up to use as a decoration.
I was impressed with the coaster, as I am looking for things for my one table and having a terrible time finding things. Like I just found some napkin rings on amazon and love them. Now I am working on another table and I need napkins, I just got straws on ebay. I didn’t want paper ones so I found some plastic ones. Now my mission is the napkins. However I might make them too. Then I thik aftering seeing this I want to do the crate bars and do them too. Thank you for sharing.
Love the great tutorial on decoupage. I have the napkins but our DT never has the crates or slated one. Which I love. Thanks
That’s a bummer they don’t have the wood crates and slats. Hopefully they have other cute wood stuff you can decoupage. I really want to do a birdhouse this year so I’ll be keeping my eye out for them at my Dollar Tree.
Love these! You gave me great ideas for my crates like these! A tip: use a piece of plastic wrap over the top of your napkin to smooth the napkin out. It keeps it from tearing while you smooth with your hands.
I totally tried the plastic wrap and struggled with it. I’m sure with a little practice it would work for me. Thanks for the tip.
Thanks for adding this dollar store decoupage craft to your DIY Home Decor post!
These are all super adorable!
Thanks Amanda! I’m going to have a hard time not buying all the cute napkins at the Dollar Store every time I visit. I’m going to turn into a weird napkin hoarder.
Really I like then all too I wish I can find some frozen napkins my granddaughters lives for frozen characters their bedroom will be frozen characters.
Hi Sonja! They have Frozen napkins on Amazon. You really can decoupage any type of wood with napkins. Dresser drawers or a dresser top would look so cute with Frozen napkins.