How to DIY a Wall Christmas Tree Using Lights
Discover the magic of a DIY Wall Christmas Tree using lights: space-saving, budget-friendly, and simple but elegant. Embrace the holiday spirit with twinkling lights adorning your walls, creating a festive atmosphere that’s both practical and captivating.

(THIS POST PROBABLY CONTAINS AFFILIATE LINKS. OUR FULL DISCLOSURE POLICY IS LONG & BORING BUT, YOU CAN FIND IT HERE.)
Wall Christmas Tree Using Lights
Do you love the look of a big, beautiful traditional Christmas tree, but you don’t have enough space? What if you don’t want to blow a large portion of your Christmas budget on a tree this year? Maybe you just want your holiday season to be low key and more minimalist?
We can help with a DIY wall Christmas tree using lights! Read on to find out how easy this great project of a wall-mounted Christmas tree can be.
Is there anything that ushers in the spirit of Christmas more than a Christmas tree at Christmas time? Live trees are beautiful. The fresh greenery can breathe life into the holidays in the dead cold of winter.
But that traditional tree can take up a lot of room in your home. And an artificial tree can be pretty expensive.
So how can you have the beauty of a Christmas tree in a smaller space, or if you don’t have a large budget? An easy DIY Christmas Wall Tree using your regular string lights might be the perfect solution.
In this post I will help you consider if this alternative tree is right for you this year. I’ll show you what materials you need and what simple steps to take. Many DIY Christmas tree ideas will be discussed with all kinds of alternatives you can use to make your tree unique year after year.

What to Consider Before Getting Started
While having a flat Christmas tree on your wall is a great way to decorate when you don’t have a lot of space, there are a few things to consider before you get started with your project.
First, where do you want to put your tree? You might not need a lot of floor space for a this type of Christmas tree, but you do need wall space.
Are there any logistics issues with where you want to put your wall Christmas tree? Is there an outlet near where you want to put your tree so you can plug in your lights? If not, do you own battery powered fairy lights that you could use?
Next, do you have kids or pets that might pull or chew on your lights if you hang them too low? Is putting your tree above a table or buffet as a buffer to little hands or paws better for your home?
What light should you use? Do you want to use more festive colored lights, or do you prefer the soft glow of all white lights to set the mood in your small spaces?
Once all these things have been considered, we can get to the fun part and start building your space-saving Christmas tree.
Materials You Will Need
Let’s start with the basic materials for the most simple version of a wall Christmas tree using lights.
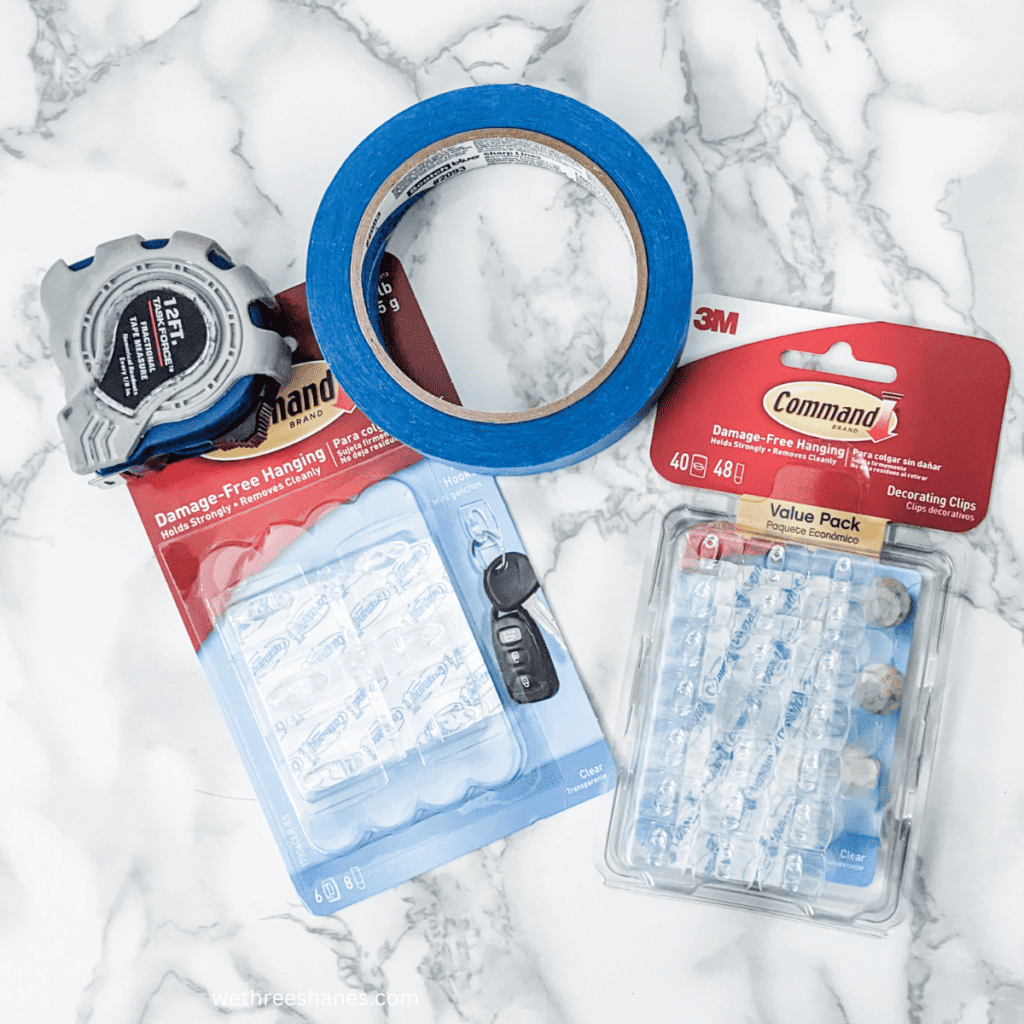
You will need:
- A measuring tape
- Painters tape
- Command hooks and adhesive strips (I like smaller ones for holding the lights and a slightly bigger one for the top, to hold the female end of the light strand and tree topper.)
- Lights
- Tree topper (This helps hide the plug.)
Additional items you can add.
- Decorations
- Garland
- Real greenery
- Hooks, pins, ties, or ribbon (to hold decorative items)
- Container to symbolize a trunk (if you don’t want to make the trunk shape out of lights)
Steps for Creating Your DIY wall Christmas Tree Using Lights
Follow these steps to help make your DIY project simple, and quick.
Step 1- Pick your spot and make sure it is clean
Once you have considered everything, pick your spot, and make sure the wall is clean. The adhesive for your command hooks will hold so much better on a clean, dry surface.
Step 2- Let’s make the outline of your Christmas tree shape.
How tall and wide do you want your tree to be? Make sure the lights you have are long enough for the size of tree you want.
First decide where you want the top of the tree to be, and place your larger hook here.
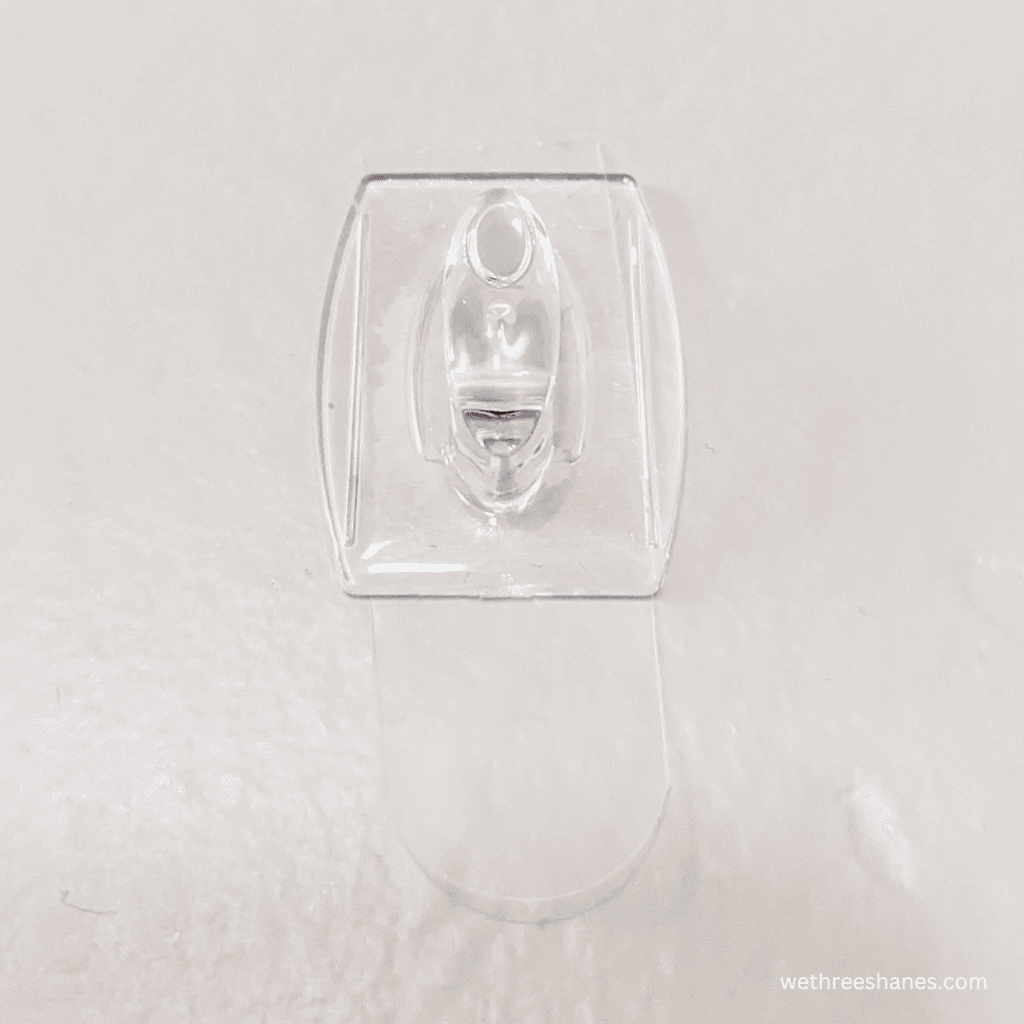
(I centered mine above the outlet I was going to use so the outlet and excess wire could be more easily hidden by my basket “tree trunk”.)
Decide how wide you want the bottom of the tree to be. Use your measuring tape to help you figure this out and then make the line with your painter tape.
Then you can use the top hook and bottom line with your measuring tape to make the sides of the tree and mark those with your painters tape as well. Decide whether you want vertical or horizontal zig-zag lines so you can tape and hook accordingly.
*Even though there were not going to be any hooks in the center, I did a center line of tape. This helps guide your other lines to make sure they are spaced evenly.
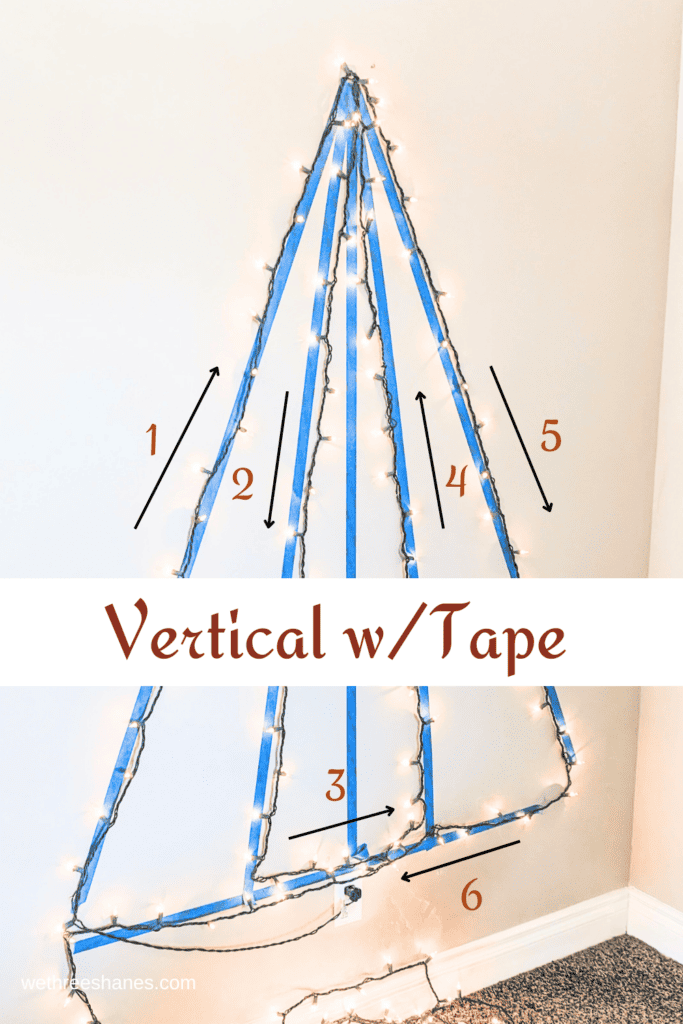

Also decide if you are going to use the inside or outside of your tape as you outline. This will be your guide for where to place your command hooks.
You can mark on the tape next to where you want your command hooks to be. Eyeball or use your measuring tape to make sure things are spread out evenly before you Place the hooks.
Step 3- Place your Command Hooks
Once you know where you want your command hooks, you can start placing them.
Remove the sticker from one side of the adhesive and place it on the hook. Then remove the other side and place the hook on the wall, using the painters tape as your guide.
Remember to make sure the hook is going the direction you want it to before sticking it to the wall!
Step 4- Remove the Painters Tape
Once all of your hooks are in place, you can go ahead and remove the painters tape. If you put the lights on first, it will make it harder to get the tape off later.
Step 5- Hook on Your Lights
*If needed, use the arrows in the pictures above to help you understand the instructions.
For the vertical look, plug in your lights on the bottom. Then hang your lights along the bottom going towards the left bottom corner. Then go up the whole left side until you get to the top. Then go down your left center, along the center bottom, and up the right center to your top point again. Then you will go back down the far right side. Finish by going back across the bottom, where you can hide your excess lights in your container (trunk).
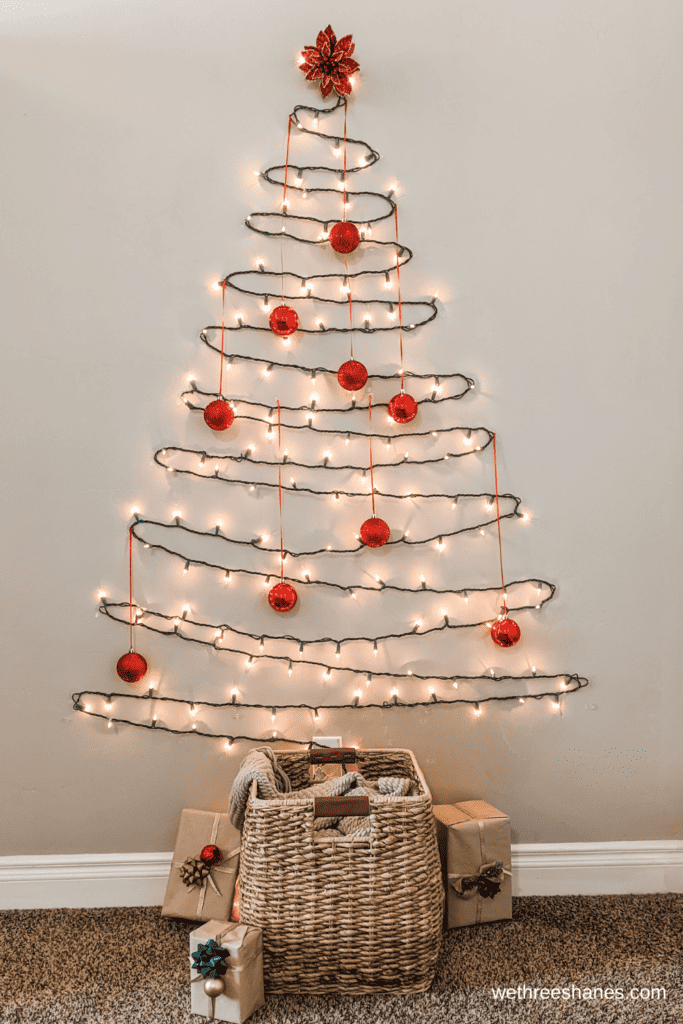
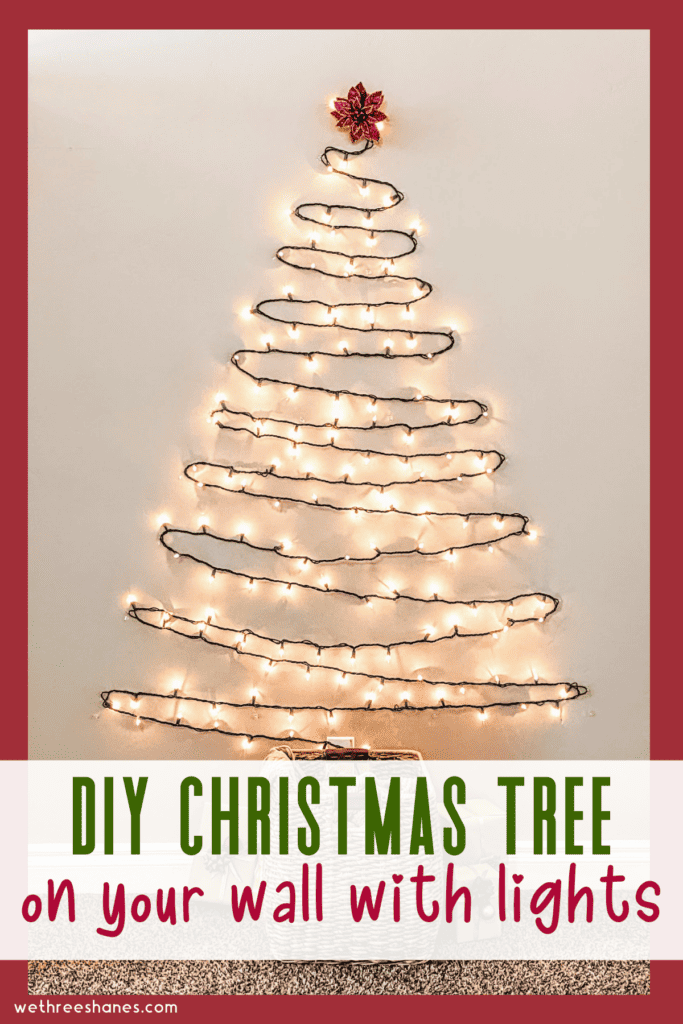
For the horizontal zig-zag (my personal favorite), start from the top. Hang the female end of your lights on the bigger hook at the top of your tree and work your way down, back and forth, right to left. Eventually, the plug and any excess wire will be at the bottom of your tree near the outlet, and you can then plug it in.
Step 6- The Trunk
Decide if you are going to make a trunk shape with your lights, or if you are going to use a container as your trunk to hide the excess wire and your outlet.
I used a wicker basket as my trunk. I liked that it was the color of a trunk and that it hid my excess lights, wire, and the outlet.
Step 7- Light Your Tree, and Decorate It
Plug in your lights and enjoy your tree. If you would like to add decorations, you can do that now.
Step 8- Enjoy Your Wall Christmas Tree Using Lights!
That’s it. Pretty easy right? I love how customizable a Christmas light wall tree is and how simple it is to make.
Decorating Your Tree
At the very least, I like to add a tree topper to my wall Christmas tree. It hides the female end of my strand of lights. Some ideas would be to hang a traditional star, poinsettia, or snow flake.
Also remember that if you are going to hang additional Christmas decorations from your lights, make sure the items aren’t too heavy. I hung some Christmas ornaments on ribbon from my tree, but I used them sparingly and spread them apart to make sure they were not too heavy for the hooks, since they were already holding the lights.
If you really want to make good use of your space, you could hang your Christmas cards from your wall tree and have a nice display.
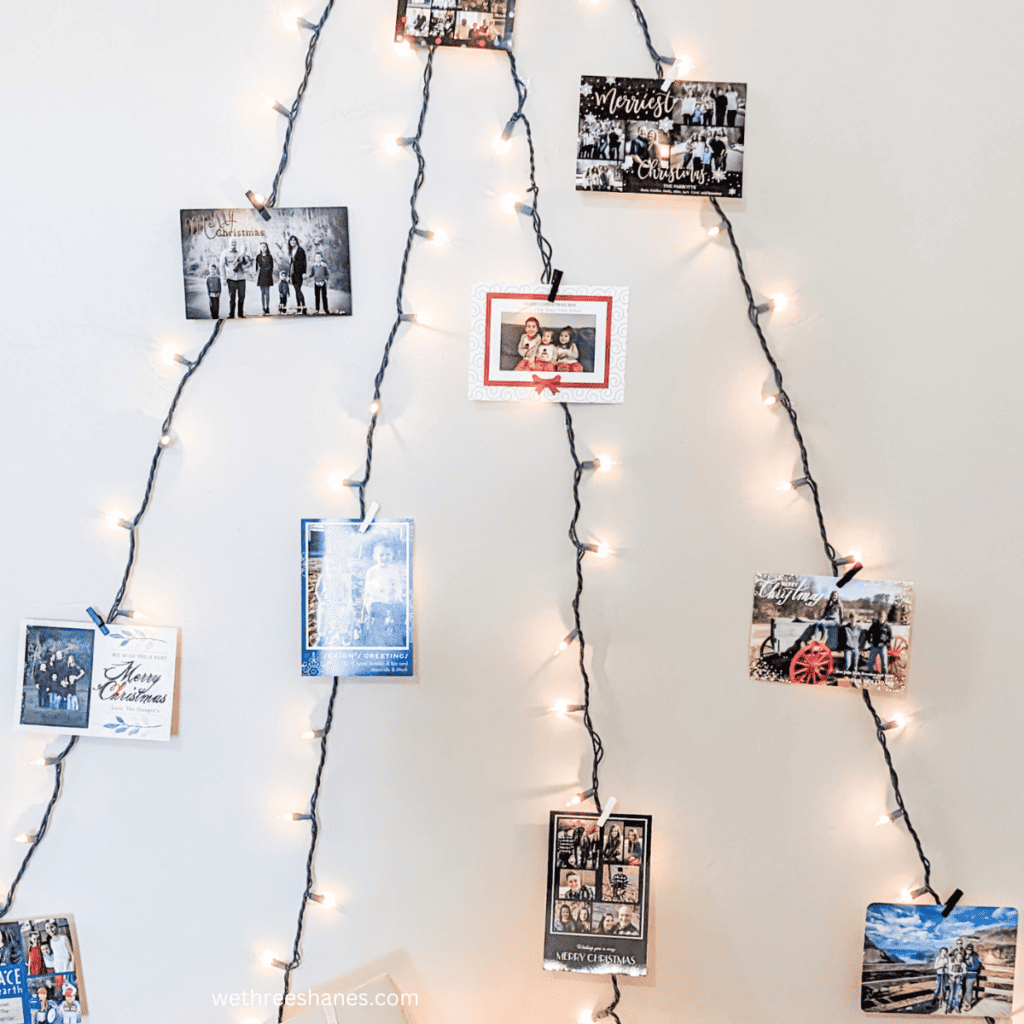
Some people like to hang pre-lit garland on their hooks (just make sure you take hook size into consideration) to give their wall tree a more traditional look. You could even twist tie in some real pine garland or pine cones to get some of that real tree smell into your home.
Alternatives to Your Wall Christmas Tree
If you have young children or pets that make you really worry about with electricity, you could use your hooks to hang decorative string or garland with no lights. Some people will even use their hooks and add wire to hang real tree branches in the shape of a tree. You just decide what feels right for you and your family.


Another option if you want lights, but want to keep your tree out of the reach of little hands or paws would, of course, be to put it higher above a counter, table, or buffet.
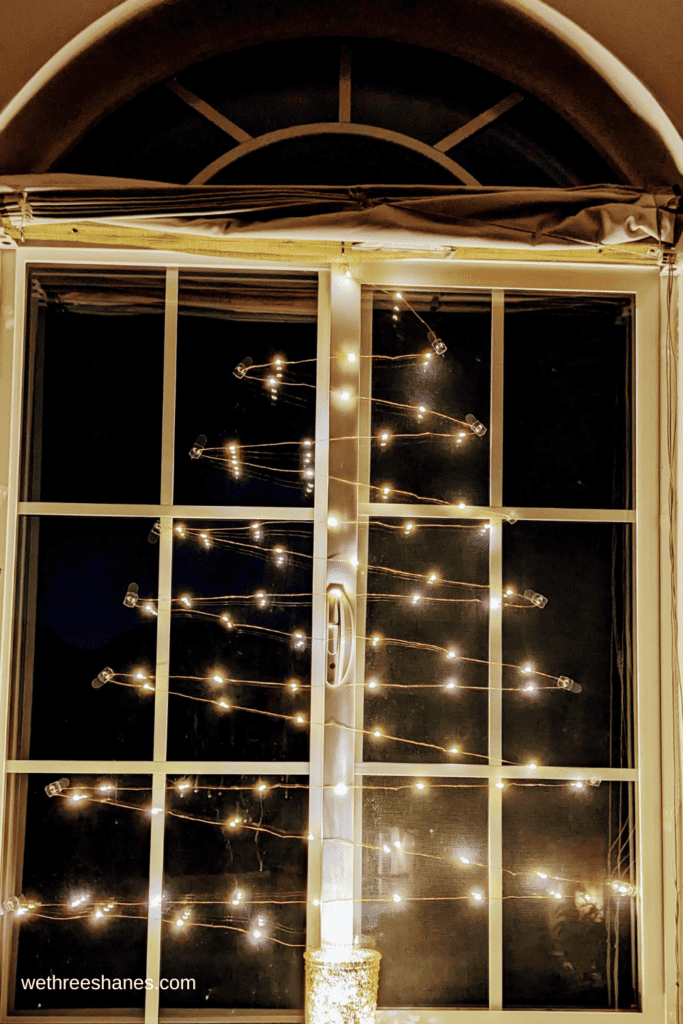
You can also make a smaller tree in a window with battery powered fairy lights. And this way your neighbors could enjoy your light tree as well.
If you have a little more space, and want a slightly more traditional look, but just don’t want to spend your money on a pricey tree, you can string your lights between two walls in a corner. Place your Christmas gifts around it, and you will barely notice there is not actually a tree there.
Have Fun with Your Wall Tree
Remember to have fun with your wall tree. This is an easy project that can be changed up year after year without a huge impact on the environment or your wallet.
Most people already have a collection of Christmas items in storage, so you can keep your wall tree fresh without having to purchase many items. You can use different lights, materials, patterns, and ornaments every year. You can have a beautiful tree while not buying new items or breaking your budget.
And these trees are so easy to put up, you will have more time to spend with your loved ones while still having a beautiful tree.
Have you ever made a wall Christmas tree before? Would you make one? Would you decorate it with ornaments, or just leave it with lights? Let us know in the comments!
You Might Also Like:
25 Fun Family Activities to do on Christmas Eve
Easy Set Up For Christmas Card Photos at Home
DIY Dollar Store Tin Christmas Candles
How to Make a Simple Christmas Floral Arrangement
