DIY Jenga Blocks Crafts Using Dollar Tree Supplies
Use Dollar Tree jenga blocks and calendars to make the cutest magnets and ornaments. A super easy craft that makes great DIY gifts.
(THIS POST PROBABLY CONTAINS AFFILIATE LINKS. OUR FULL DISCLOSURE POLICY IS LONG & BORING BUT, YOU CAN FIND IT HERE.)
Quick update – The new 2022 calendars have been popping at the Dollar Tree stores near me. There are some cute ones so make sure to grab them while supplies last.
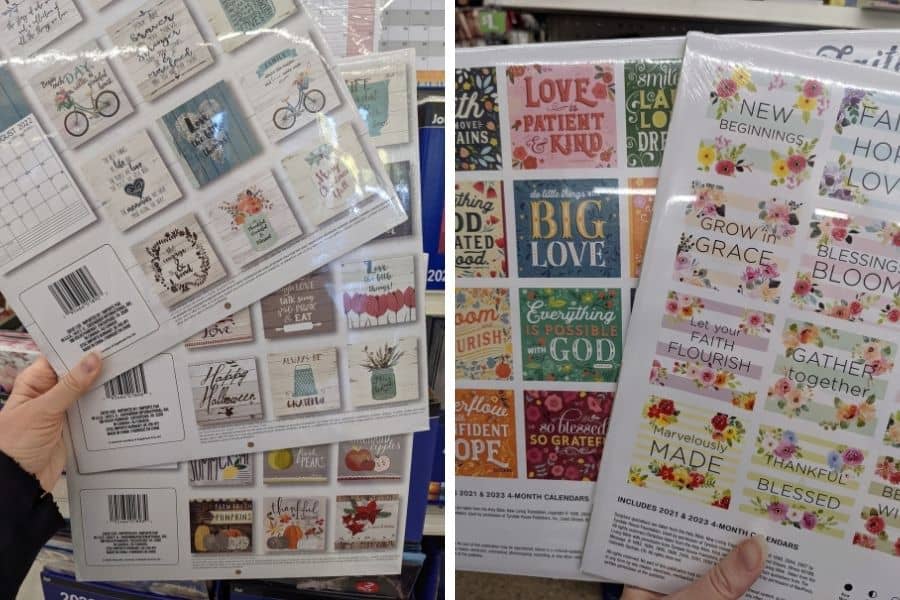
DIY Jenga Blocks Crafts
It’s Friday which means our last day of Dollar Tree calendar crafts. If you read Monday’s post then you’ll know I saved my favorite craft for last. Actually, it’s two crafts in one and I love them both!
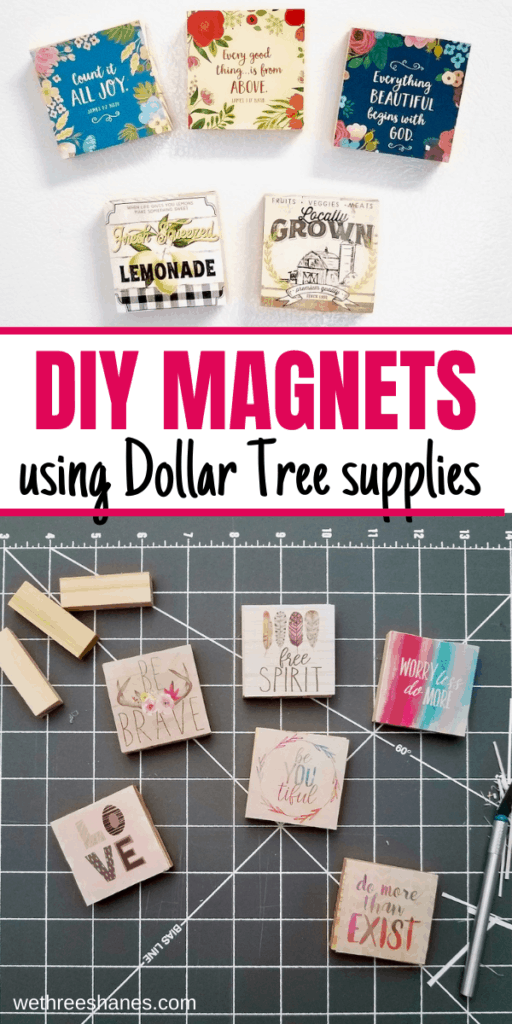
Today we’ll be using mini jenga blocks from the Dollar Tree. These little wood blocks are so versatile. I’ve seen some pretty creative crafts using them. Search up jenga block crafts on Pinterest and so many clever DIY ideas pop up.
We’ll be glueing jenga blocks together to form a square and then glueing the calendar pieces to them. From there you can turn your squares into magnets or adorable Christmas ornaments. I’ll be showing you how to do both in today’s tutorial.
Turn your Jenga Blocks into Adorable Squares
Calendars always have small square photos on the back to show you what each calendar page looks like. We’ll be using those squares for our projects today. That means we can use the actual calendar pages for all the other crafts we’ve done this week.
- Cut Out Calendar Squares
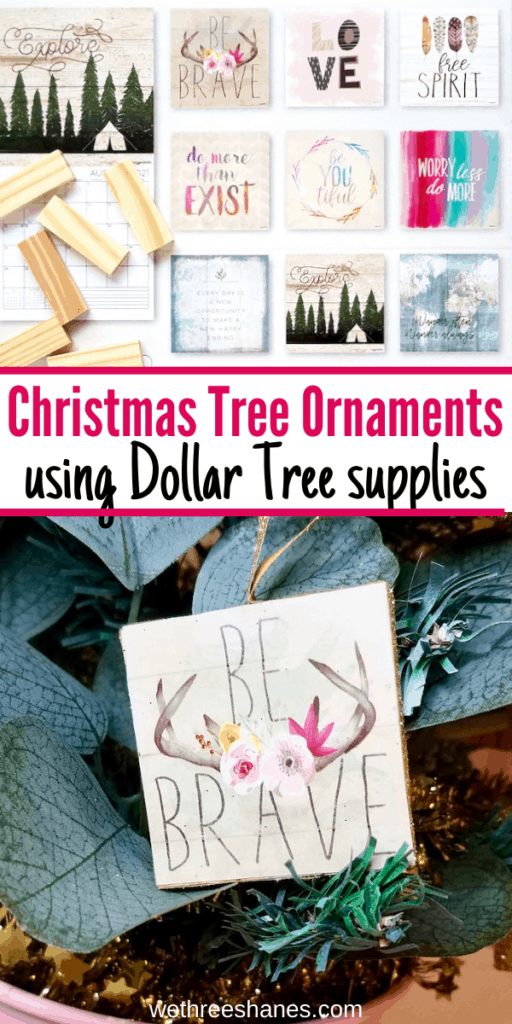
First, you’ll cut all the squares out from the back of the calendar. Which calendars you pick will depend on what you want to use this craft for. We’ll be making magnets and Christmas ornaments. Here’s a look at 3 calendar backs:
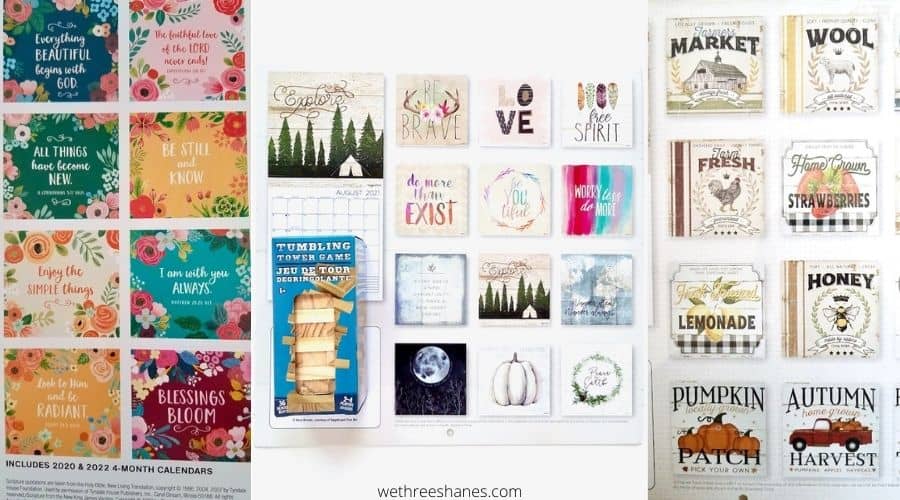
The floral calendar on the right is perfect for magnet gifts. They have cute little sayings and scriptures on them so I’ll be giving them to friends and people I serve with at church.
The top 6 squares of the middle calendar are perfect for tweens and teens. I love the uplifting mantras on these photos. For today’s craft, they will be turned into Christmas ornaments for a girl’s room Christmas tree.
Farmhouse calendar photos on the third calendar are great for kitchen magnets. They will look so cute stuck to the fridge.
2. Glue Jenga Pieces Together
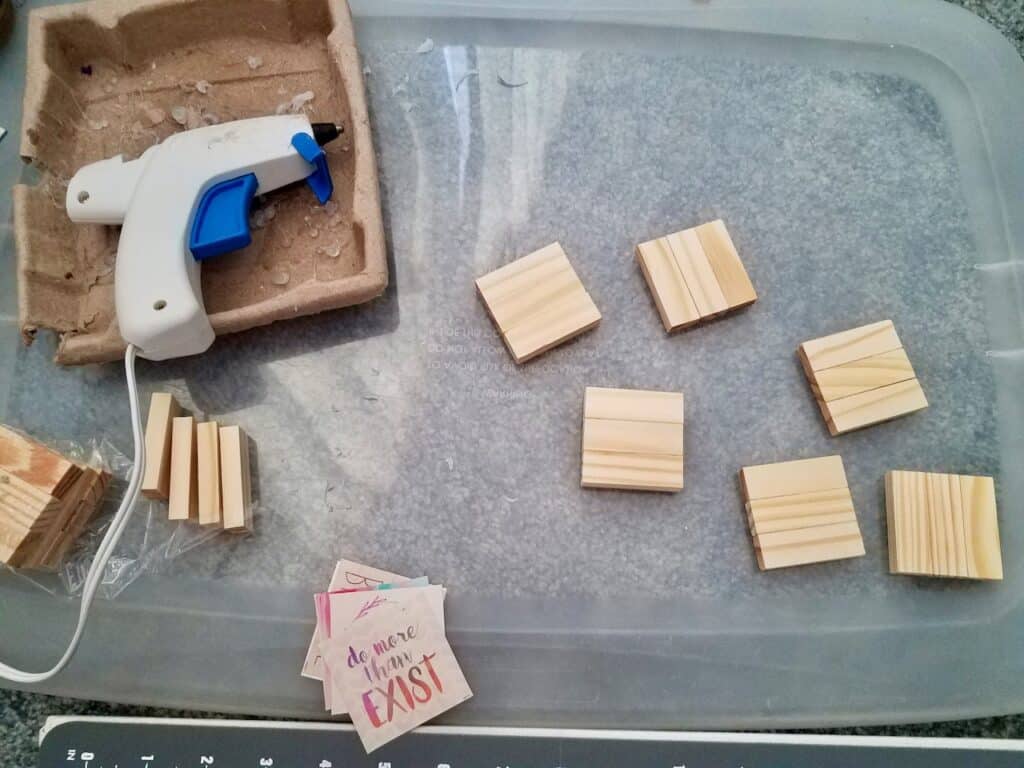
You need to glue three jenga blocks together. Hot glue works but can be a little bulky. I still prefer it because I love how fast it dries. Just squeeze the blocks together really well to help distribute the glue and prevent gaps between the jenja piece.
Each set of Dollar Tree jenga blocks come with 36 pieces. That means you can make 12 squares with them. Each square becomes a magnet or ornament.
3. Trim Calendar Squares
Once the blocks have dried, you want to make sure the calendar photo fits perfectly on each jenga square. Lay the calendar piece down and then center the blocks on top. You’ll see just a bit of edge hanging over so you’ll need to cut it off.
Make sure you are doing this on a surface you can cut on. I used a cutting mat but a thick piece of cardboard would work too.
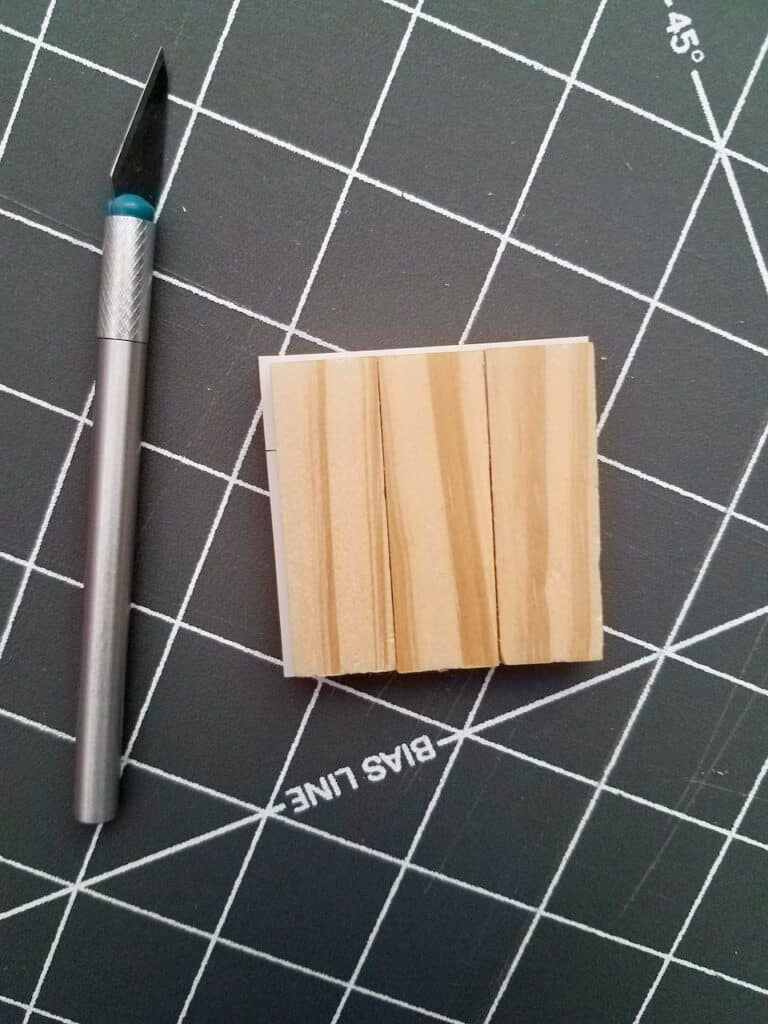
Take a craft knife, I got this one from the Dollar Tree, and cut the excess edges off. Make sure you are pressing down on the blocks firmly so they don’t slip out of place. Do this for all 12 sets.
When you are done, your calendar pics should fit perfectly on each wood block and you’ll have lots of thins strips that have been cut away.
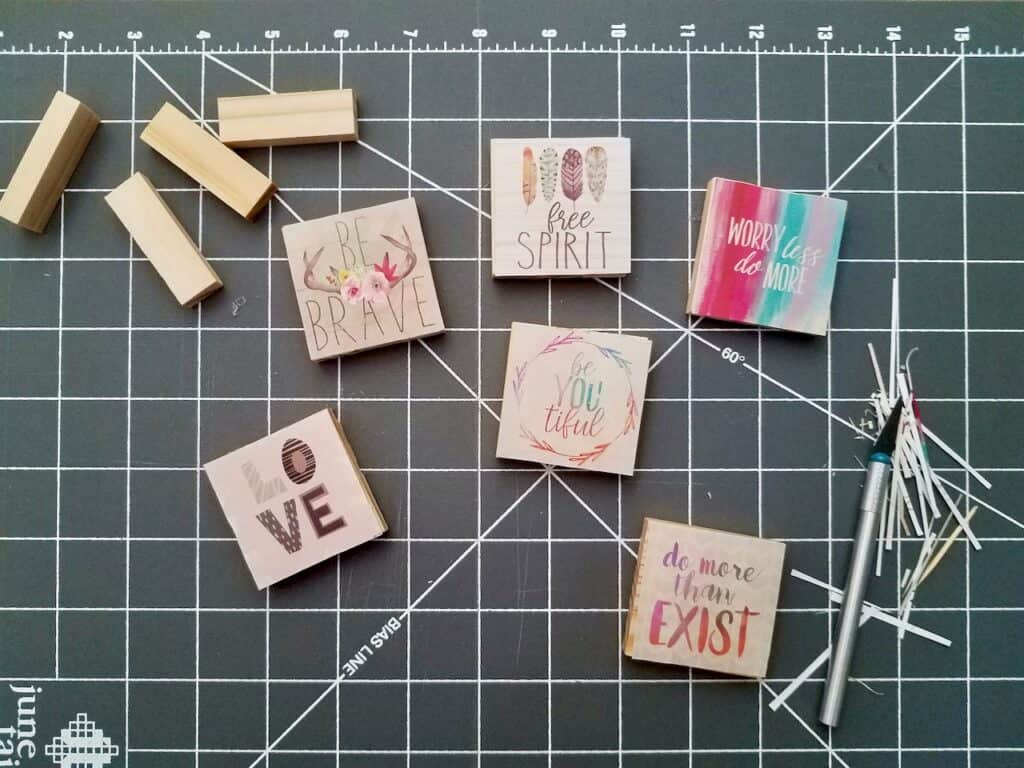
4. Glue Calendar Pieces to Jenga Blocks
It’s time to glue the calendar pieces to the jenga blocks. The best glue for this is a spray glue. I tried the dollar store brand and it’s not great. It does technically work so if you’re on a tight budget then go for it.
The glue is very watery and not very tacky so it doesn’t hold the paper in place. You need to constantly press and smooth the calendar piece onto the jenga blocks until they finally stay. It’s annoying and time consuming.
Stick with Elmer’s spray adhesive. It doesn’t matter which kind. You can use the craft bond or spray adhesive. Links are so you can see what glue I’m talking about. It’s cheaper to buy at Walmart.
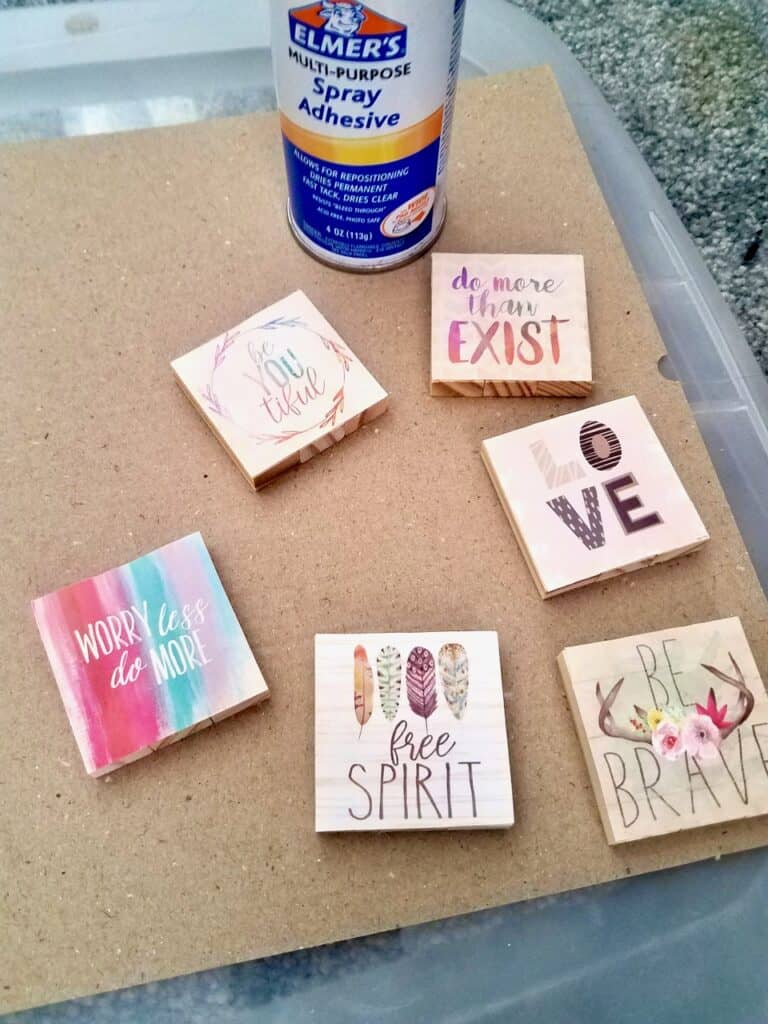
Other types of glue will work but a spray adhesive gives the best, smooth finish. Just make sure to spray outside or on a big cardboard surface because the spray can make everything around it sticky.
Now, your blocks are done. You can make magnets or ornaments out of them!
How to Make Magnets Out of Jenga Blocks
It’s time to make magnets out of our jenga blocks. All we need to do know is glue magnets to the back.
You can use circle magnets or flat square magnets. The round magnets will make the jenga blocks stick out a little so I prefer to use flat magnets.
Honestly, I reuse magnets I get from businesses. I’m constantly getting these in the mail so I put them with my craft supplies. This is the perfect project to reuse them.
You do need to glue these to the back yourself. I used the same spray adhesive.
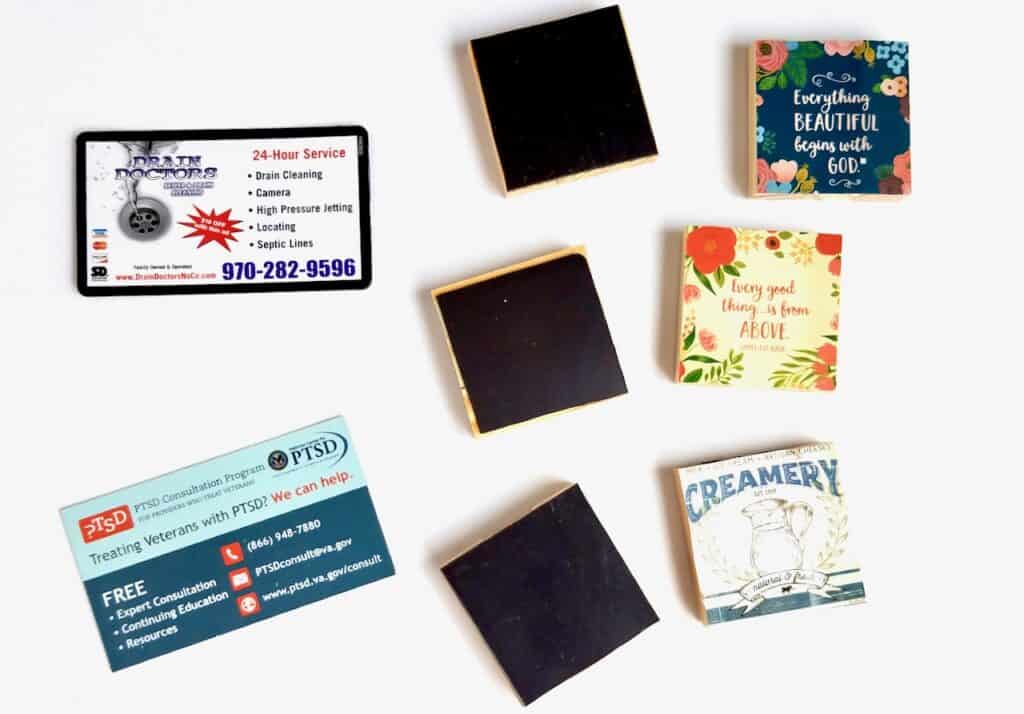
If you need to buy magnets then I’d get adhesive magnet sheets. These magnet sheets can be cut to fit the exact shape of the back which gives the magnets a nice, clean look. It’s a bit extra work but they look the best.
Just lay the block on the magnet sheet and trace. Then cut the squares out, peel off the paper backing and stick the adhesive side down on the back of the jenga block.
Basically, you’re done with your magnets. I just love these things. They are adorable and look great on the fridge. This is definitely a DIY craft I don’t mind gifting.
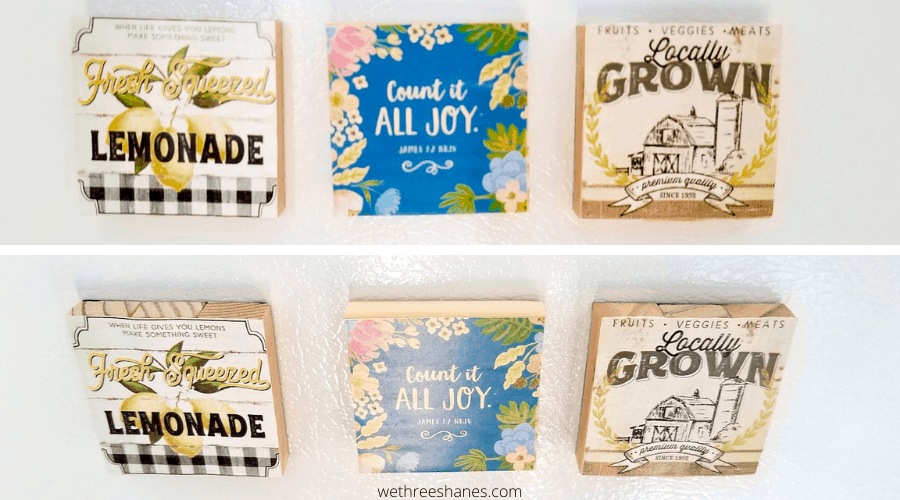
Ideas for Dressing Up Jenga Magnets
These magnets look great as is but there are a couple extra steps you can do to take them to the next level.
- Paint or stain the jenga blocks before you glue them together. Personally, I prefer the look of the natural wood but you can definitely add some more color with paint or stain.
- You can glue some ribbon or twine around the edge of the jenga block as a last step. Once everything has been glued on, you’ll add glue to the edges of the magnet and then wrap the ribbon or twine around the edge.
I like the look of the raw wood edge so I left mine unwrapped but I’m using ribbon on the Christmas ornaments so you’ll be able to see what it looks like. It’s pretty cute and does create a finished look.
How to Make Ornaments Out of Jenga Pieces
To make Christmas ornaments you’re going to follow the same instructions as above but skip the magnet part. Instead, you will glue ribbon around the edge of the jenga blocks to form a loop so you can hang it on the Christmas Tree.
- First, I had to cut the ribbon to fit around the edge of the block because it was too thick. The ribbon from the dollar store was a perfect fit when cut down the middle.

2. Now, you need to wrap the ribbon around the block making sure to leave some room for the loop. You will over lap the ribbon just a bit at the bottom. Just eyeball for now and then use that piece to cut the rest of the ribbon to size.
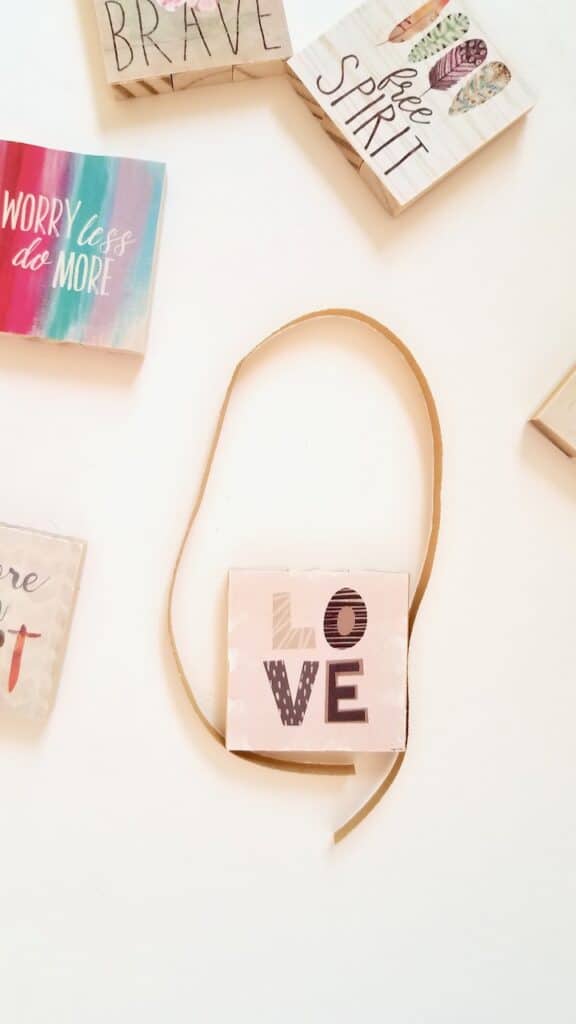
3. Start the glueing process at the bottom of the block. Glue one end of the ribbon down along the bottom of the block. Then glue the other ribbon end over the top of the first ribbon end, overlapping just a bit.
I used hot glue for this step. I also used a popsicle stick to really smooth out the glue and ribbon so I didn’t burn my fingers. Squeeze a little line of hot glue along the edge, press the ribbon on the glue, then run the popsicle stick across the ribbon to smooth everything out.
Don’t get glue happy. You don’t need a lot. The parts of ribbon that look the worst on my ornaments are the parts where I was heavy handed with the glue. You really don’t need much.
Once you glue the bottom ribbon down you’ll do the same thing with both sides and then you’ll finish up by glueing each end of ribbon only half way at the top. They should meet in the middle creating the hoop to hang from the tree.
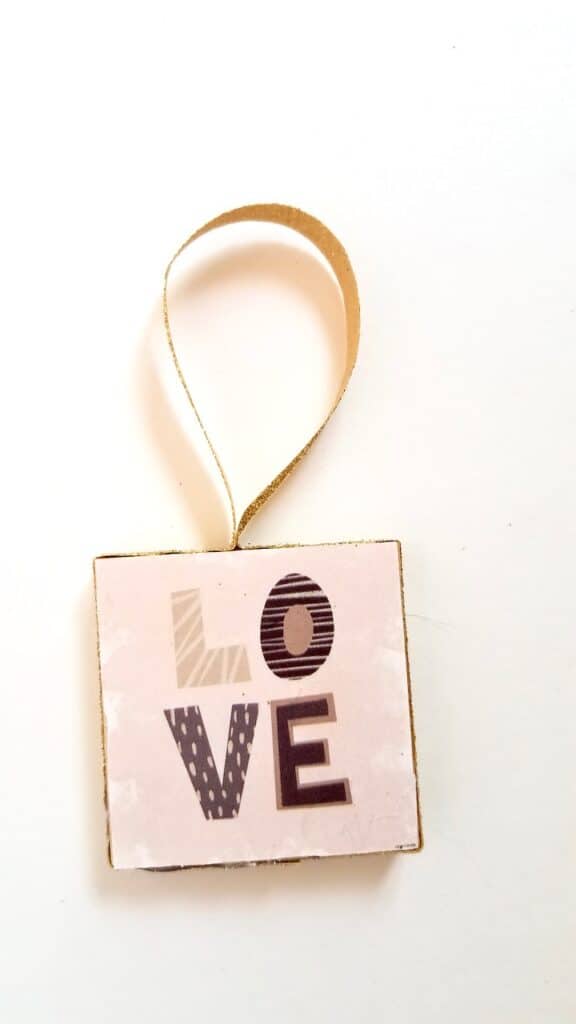
You’ve got your first girl power ornament. Just complete the same process with the other five jenga blocks. Now, you need a super cute mini Christmas tree to hang these on. Keep reading to see how to make one for less than $10!
How to Make a Christmas Tree for a Girl’s Room
You’ve got some adorable Christmas ornaments made but where are you going to hang them? These uplifting quote ornaments will look so cute on a Christmas tree in a girl’s bedroom. If your daughter/granddaughter doesn’t already have one then you can make one.
Supplies Needed to Make a Dollar Store Christmas Tree
Most of the supplies comes from the Dollar Tree but a couple come from Walmart. All the Walmart products I used are a dollar or less so same price as a dollar store but an extra trip.
- One Christmas tree from the Dollar Tree
- Bucket from the floral section of the Dollar Tree
- Floral foam blocks from the Dollar Tree
- Sparkly tinsel garland from the Dollar Tree
- Letter Stickers from the Dollar Tree
- Two sprigs of Eucalyptus leaves from Walmart
- Light Pink paint from Walmart
- 99 cent White Spray Paint from Walmart – optional
I had the pink and white paint already but if you don’t you’ll have to buy some. Obviously, you don’t need to go with the same colors I chose but I think the gold and pink match the DIY jenga block ornaments best.
This tree will go in a girl’s room but you can follow the same instructions and make a tree for your kitchen. Change the colors and use the farmhouse calendar pieces to make your ornaments. It would look adorable!
The white spray paint is used to lightly coat the Christmas tree. The dollar store trees are pretty fake looking and the white spray paint helps tame the color and shine of the fake branches.
Creating Your Christmas Tree
- The first thing you want to do is get all the painting done. I painted the bucket with the pink paint and a sponge brush. It took two coats of paint to get good coverage.
I took the tree outside and lightly sprayed it with the white spray paint from Walmart. I use this 99 cent spray paint for projects all the time. It goes on really light but you still need to be careful not to spray too much.
Hold the spray paint about a foot above the tree and let the spray paint fall down on the tree. Make sure to move your hand around to get the sides too.
Once the tree has dried and doesn’t smell too much like paint, then you can bring it in the house. By now the bucket should be dry and you’re ready to move on to the next step.
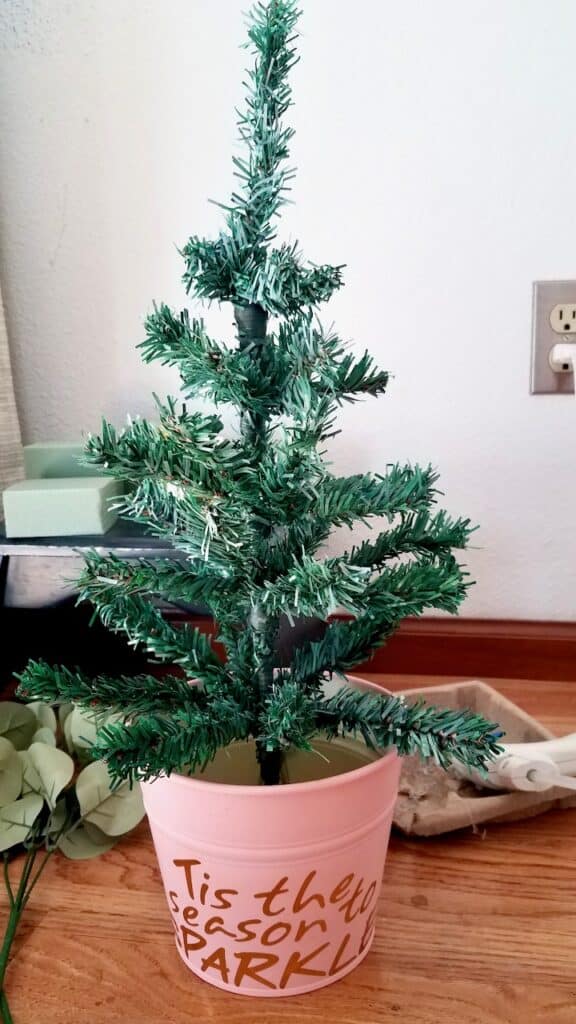
2. Add some fun to the bucket with a cute saying. You can skip this step if you want. Decide on a quote before you buy stickers so you know how many packs you need. Since this is for a girl’s room I chose the quote, ” Tis the season to sparkle”.
I needed two packs of stickers to be able to write the whole phrase out. You can chose whatever quote you want.
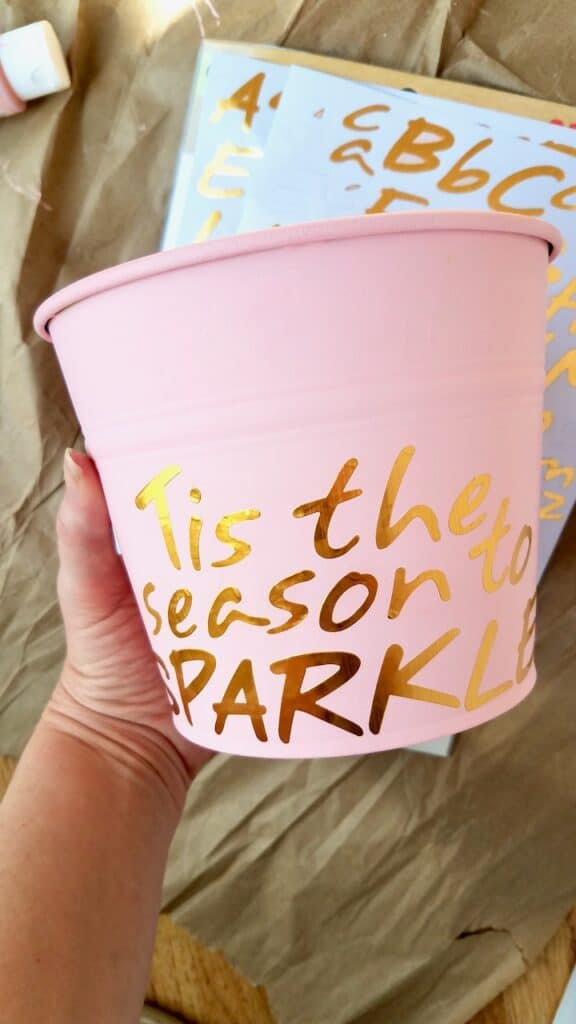
3. It’s time to glue the tree in place. First, you’ll glue one piece of floral foam to the bottom of the pot. Then you’ll glue the tree onto the foam. The foam I got at the Dollar Tree has 4 pieces inside which is perfect.
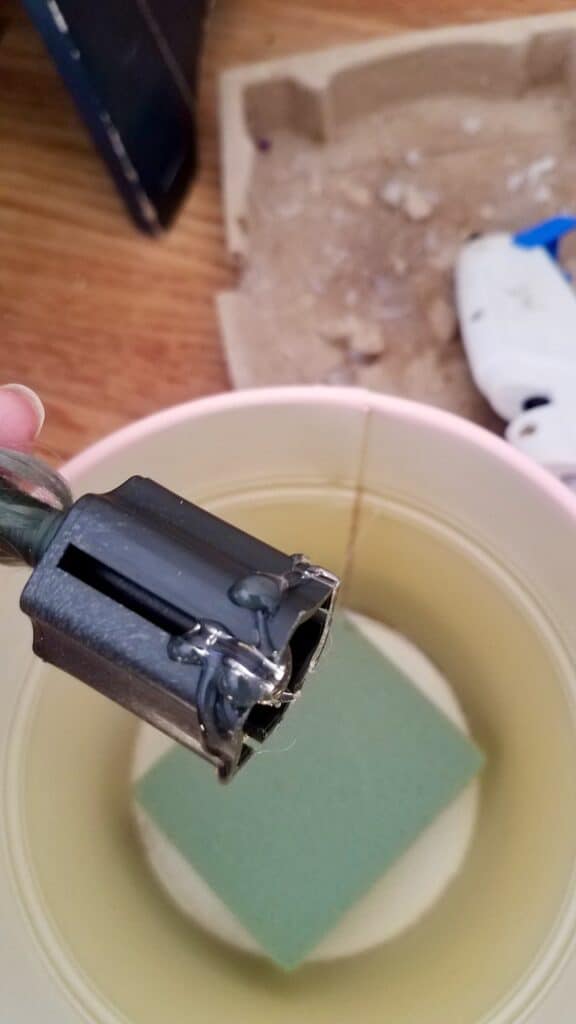
Press the tree down so it sinks into the foam a bit. When you are done your tree should look like this.
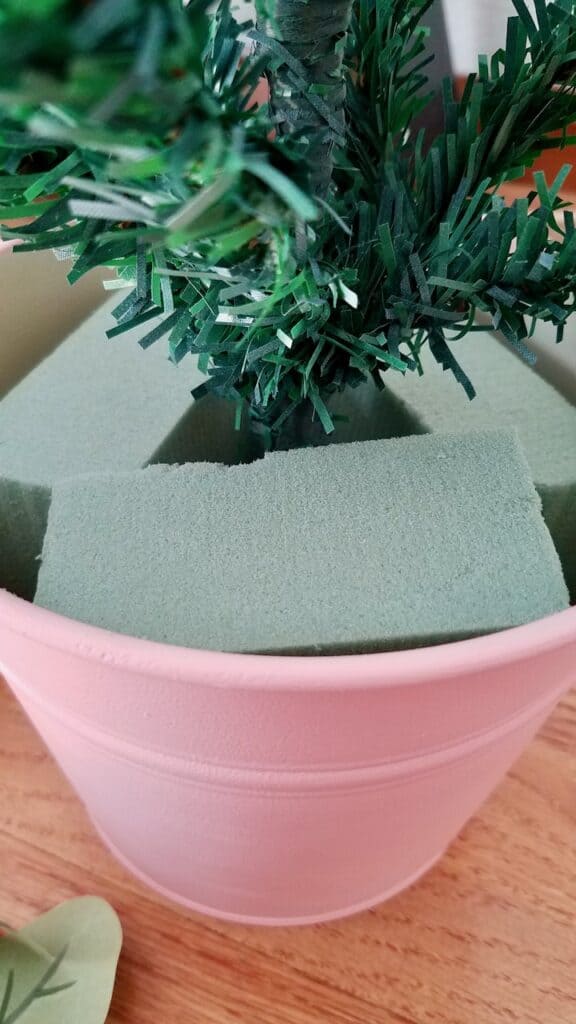
Take the other three foam pieces and stick them in the bucket around the tree bottom. My foam fit perfectly but you might need to cut yours a bit if your bucket is smaller.
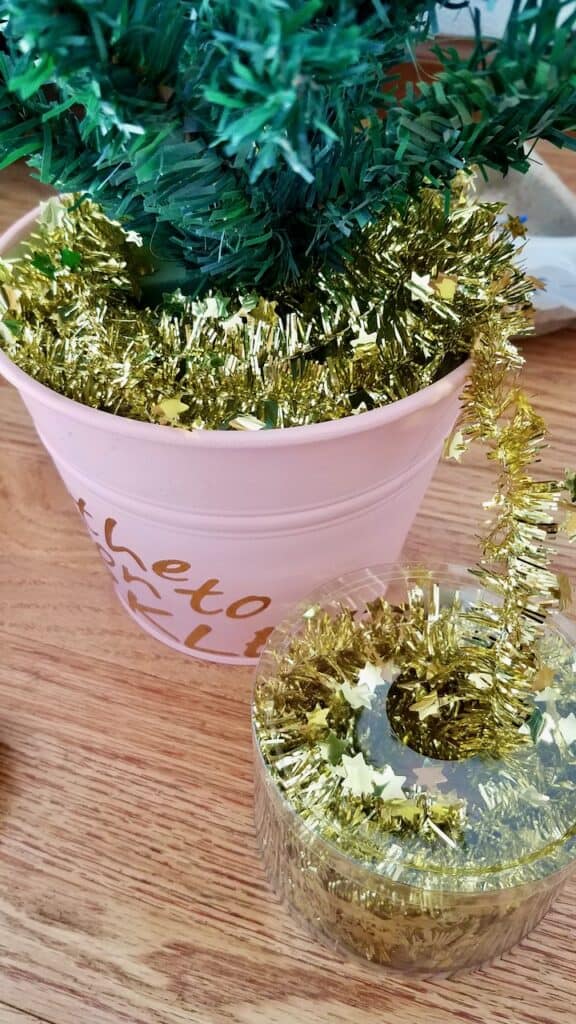
4. Wrap the bottom of the tree in the tinsel but don’t cut it yet. You’ll want to run this up the tree once the eucalyptus leaves are in place.
5. It took two sets of leaves to fill out the empty spaces in the tree. Take the first set of eucalyptus leaves apart so that the sprigs are separated. Stick the stems around the bottom and press them into the foam pieces.
Take the next set of leaves apart. You’ll have to glue these pieces into place around the middle and top of the tree. Keep the leaves on the stems and bend the stems around the trunk and glue them into place. The top leaves were taken off the longer stems and glued to the top of the trunk.
Your tree should be looking so much fuller now. I love the way the eucalyptus leaves look mixed in with the Christmas tree branches.
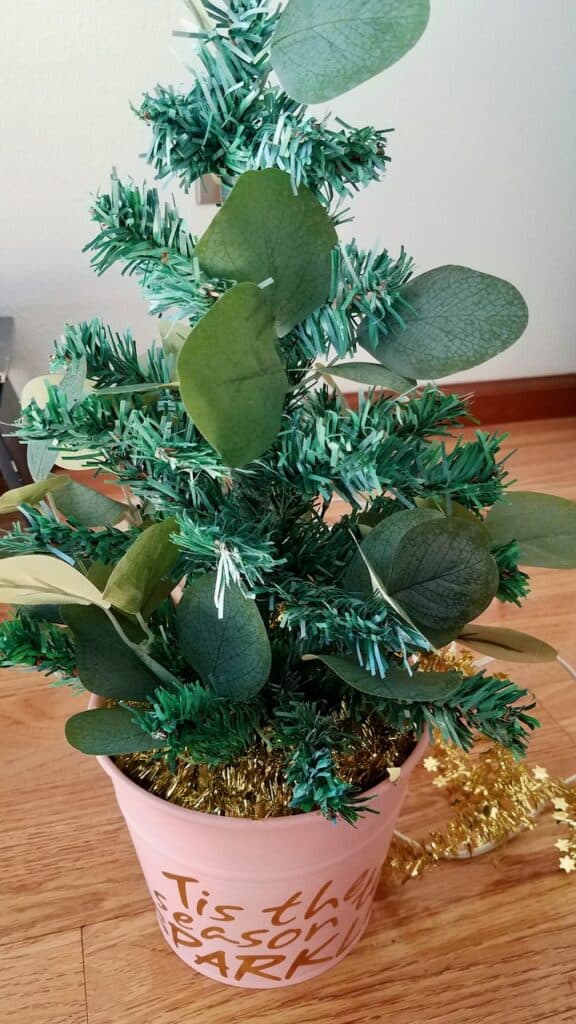
6. Wrap the rest of the garland up the tree. Cut the end off and tuck into the tree to hide it. Now, hang your jenga block ornaments on and you’re all set.
You can add more ornaments or lights to the tree if you want. It’s a small tree so too much on and it starts to look cluttered.
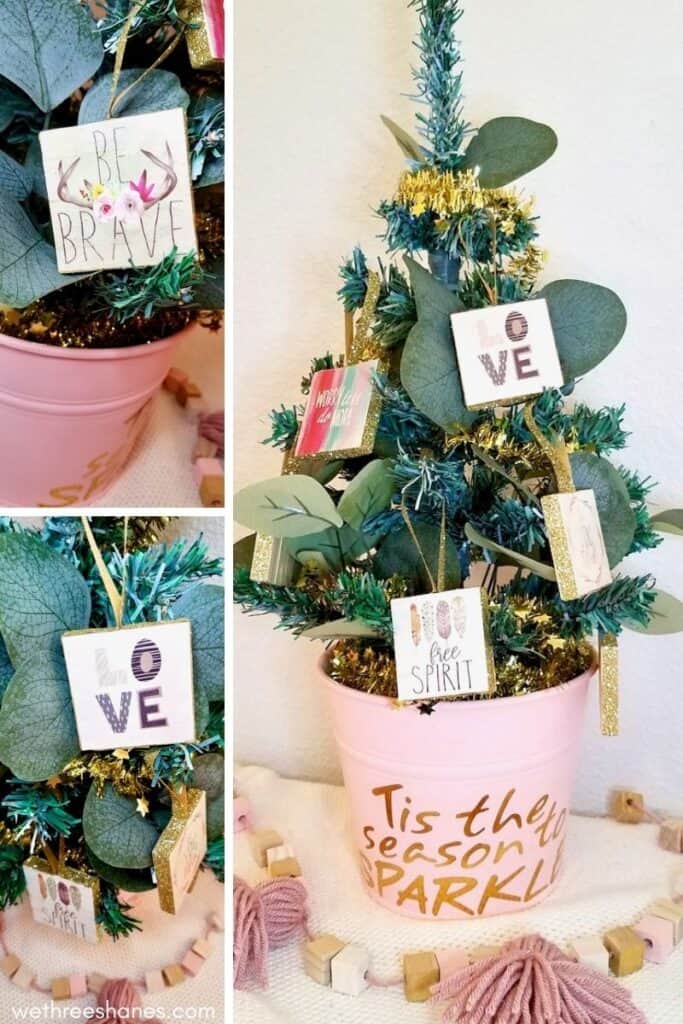
This tree is so much cuter in person. I know plenty of little girls who would love to have one in their room. This little Christmas tree could stay up for Valentine’s day or even all year round.
Jenga Block DIY’s
Hopefully, I’ve given you some ideas of your own on how to use these dollar store jenga blocks and calendars for crafting. The jenga magnets are so cute and helpful. They would make great little DIY gifts for friends.
The Christmas tree will look so cute in a little girl’s room but can be made to fit any room.
If you haven’t already checked out the other Dollar Tree Calendar crafts then make sure to check them all out. They are all budget friendly decor for the home.
